

Night photography is a stillness problem before it is a settings problem. After dark the camera needs far more time to collect an image, and everything else, support, settings, focus, follows from holding still long enough to give it that time.
Daylight forgives. There is so much light that the camera can be careless and still hand you a sharp frame. At night the arithmetic reverses: light is scarce, the camera has to work for every bit of it, and the habits that never mattered at noon start deciding whether the photo exists at all.
This page covers what actually changes after dark, in the order it matters: keeping the camera still, then the settings, then the two great night subjects, the lit city and the sky.
One Link for Everything You Shoot
A short address you control, pointing wherever your photos already live.
What Changes After Dark
Every camera builds a picture from collected light, and at night there is far less of it to collect. The camera compensates in three ways, and each has a price: it holds the shutter open longer, which records any movement as blur; it opens the lens wider, which thins the zone of sharpness; and it amplifies the signal, which adds noise.
Night photography is the craft of choosing which of those prices to pay for each picture. A city scene, a portrait under a streetlight and a starfield split the bill differently, which is why the sections below treat them separately.
The trade-offs themselves are the same three controls covered in our beginner guide. Night does not add new ones; it raises the stakes on the ones you have.
Stillness First: Supporting the Camera
With the shutter open for a long moment, the enemy is movement, yours before the subject's. Solving stillness solves most of night photography.
A tripod solves it completely. Any stable tripod turns exposure length into a free choice, and it is the single purchase that changes night work more than any camera upgrade. With one, you can keep the amplification low and let time gather the light cleanly.
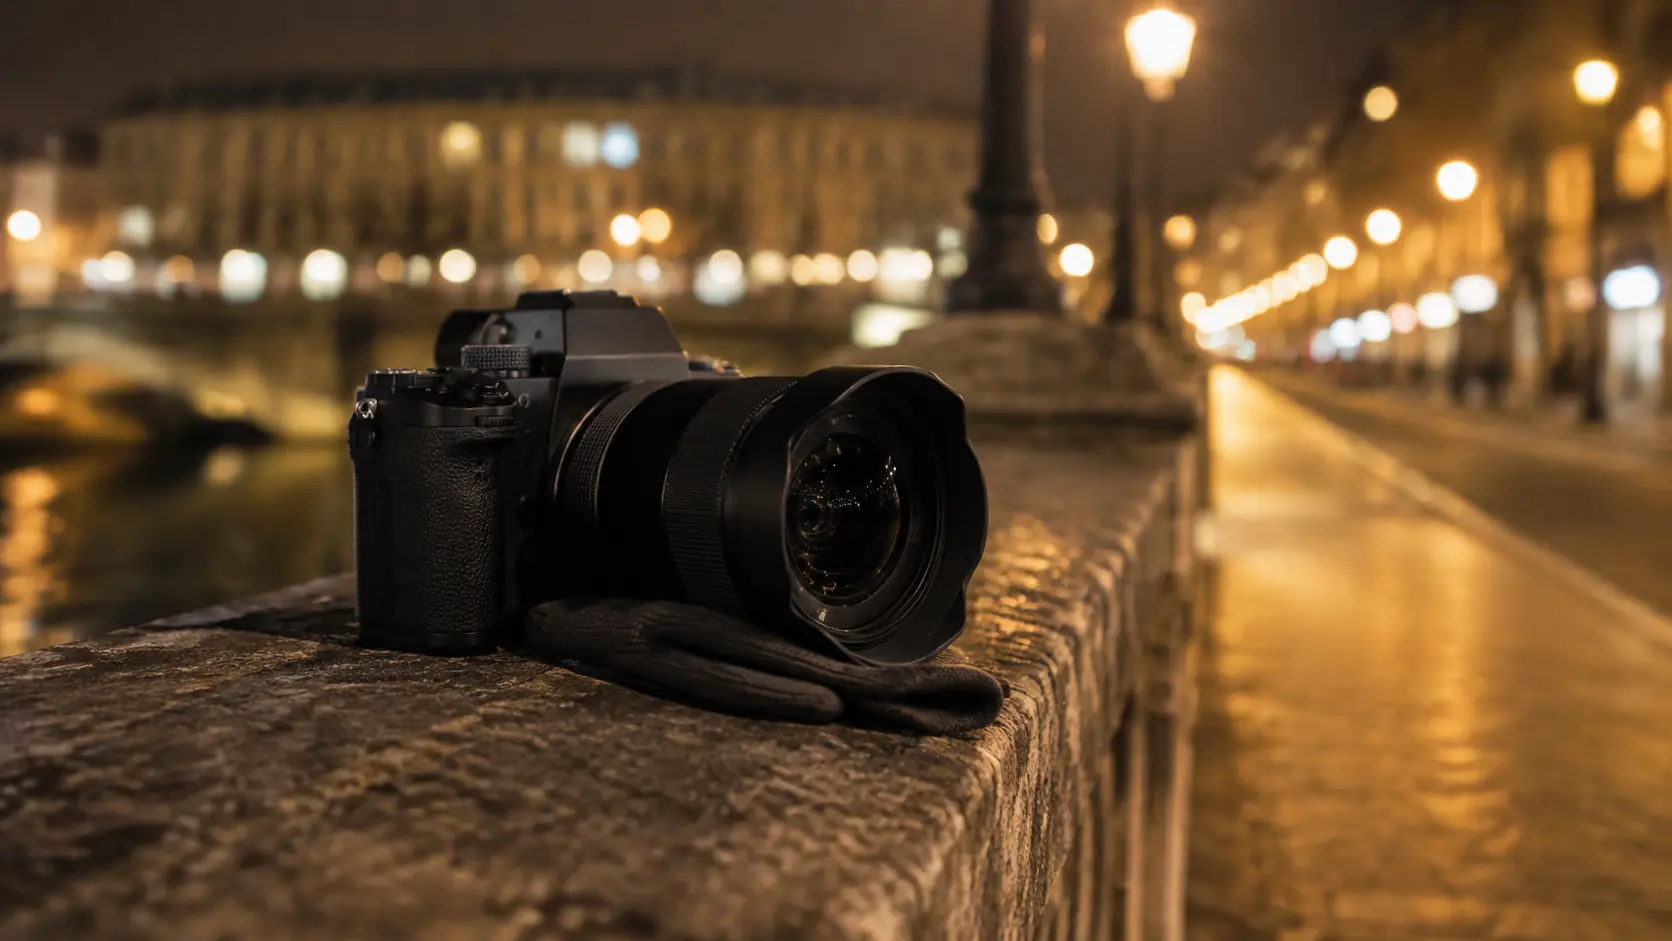
The world is full of substitutes. Walls, railings, bins, car roofs, steps. Set the camera down, prop it with a bag or a glove to angle it, and use the timer so pressing the button does not shake it. Most of the city photos in this genre are braced on street furniture, not tripods.
Handheld has a floor. Braced elbows, held breath and stabilization stretch what is possible, and phone night modes stack several short exposures to fake a long one, which works impressively for still scenes. But there is a limit no technique moves: if the scene needs seconds of light, something has to hold the camera besides your hands.
The Settings That Matter at Night
With support: keep amplification low, let the shutter stay open as long as the scene allows, and stop the lens down enough to hold the scene sharp. Time is your cheapest currency when the camera cannot move, so spend it first.
Without support: the order reverses. The shutter has to stay fast enough to hand-hold, so you open the lens fully and raise the amplification until the exposure works. The photo gains noise, and that is the correct trade: as the beginner guide puts it, a noisy sharp photo keeps the moment and a clean blurry one does not.
On a phone: night mode makes these choices for you, and mostly well. The two overrides worth knowing: tap the brightest important thing so the lights are not blown out, and hold or brace the phone for the whole countdown, because the mode is quietly doing everything this section describes.
Expose for the lights. Night scenes are mostly darkness punctuated by bright sources, and automatic metering tries to brighten the darkness, blowing the lights out on the way. Deciding what should stay dark is the exposure skill of the genre, the same protect-the-highlights judgment that golden hour demands, pushed further.
The Lit City
The city at night is not a dark scene. It is hundreds of small light sources, signs, windows, streetlamps, headlights, arranged in the dark, and that inversion is what makes it generous territory.
Work after rain when you can. Wet asphalt doubles every light in the scene as a colored reflection, and puddles hand you the mirrored compositions covered in the symmetry guide with the city providing its own illumination.
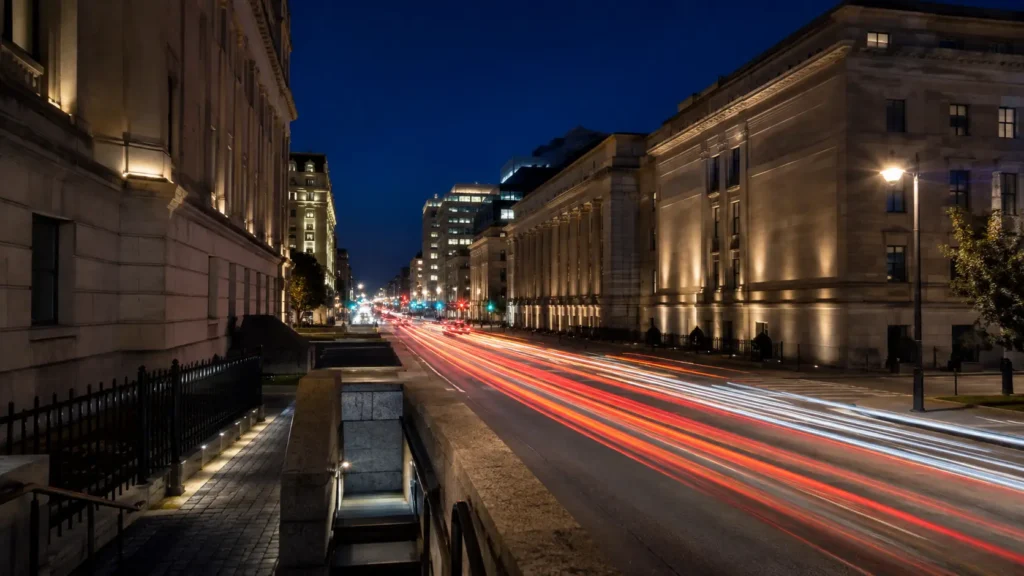
Let moving lights draw. With the camera braced and the shutter open for seconds, moving cars record as continuous ribbons of light along the road. The technique needs nothing beyond stillness and patience, and the road becomes a leading line that paints itself.
Blue hour is the city's best light. The stretch just after sunset, when the sky still holds deep blue, gives buildings a backdrop instead of a black void, and the balance between sky and artificial light lasts only minutes. It is the same window the golden hour guide ends on, and for cities it is the main event.
Share the Set, Not Fifteen Links
Point one short address at your gallery, your socials, wherever the work already sits.
The Night Sky
Stars are the extreme case of everything above: the light is faint, the exposure is long, and support is not optional. But the first requirement is not equipment, it is location.
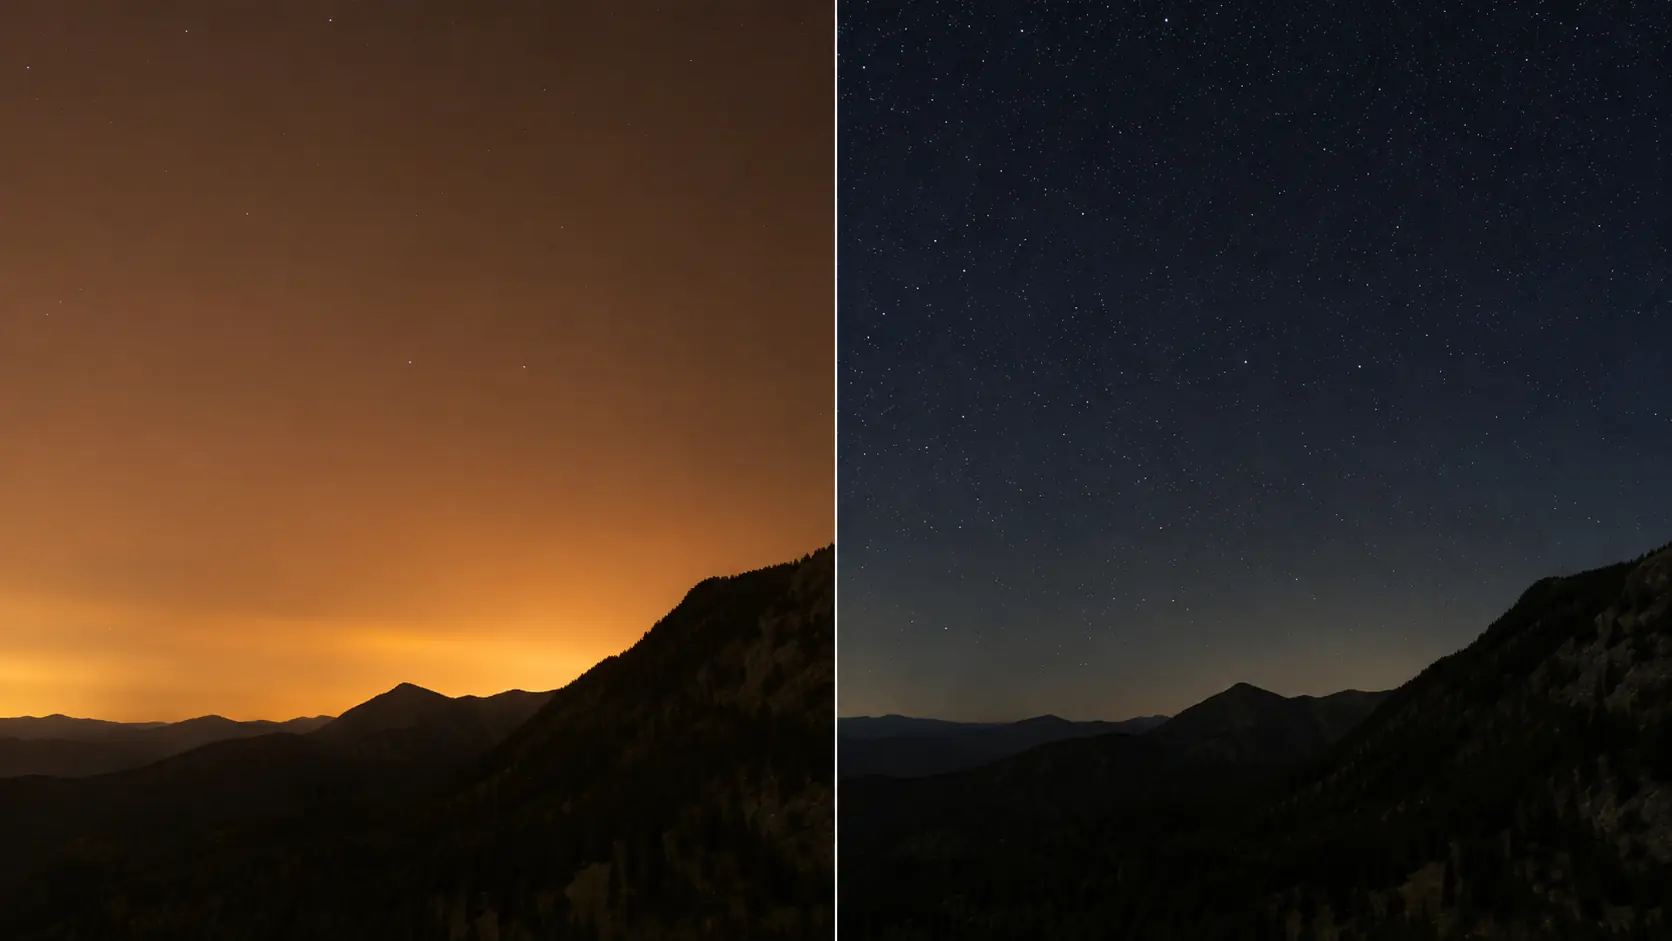
Get away from city glow. Artificial light scattered in the atmosphere washes the sky out long before it bothers your eyes, which is why the same exposure shows dozens of stars in a suburb and thousands in real darkness. Dark-sky organizations map and protect the remaining dark places, and their resources are the practical guide to what light pollution does and where to escape it.
The moon is a subject and a spotlight. A full moon is bright enough to light a landscape and drown faint stars, so starfield nights and moonlit-landscape nights are different plans. Check what the moon is doing before driving anywhere.
Keep expectations honest at first. The first clear night away from city light, with the camera braced and the exposure long, the screen shows more stars than your eyes can see. That moment is the hook of the genre, and it needs nothing more than the basics on this page done patiently.
Keep Your Photos in One Place
One address, updated whenever the work changes, with analytics on how often it gets opened.
Focusing in the Dark
Autofocus needs contrast, and darkness starves it. Three reliable escapes:
Focus on a light. Any bright point at roughly the subject's distance, a streetlamp, a lit window, gives autofocus something to bite. Lock focus there, then reframe.
Use the screen and magnify. For stars and distant lights, switch to manual focus, magnify the brightest star on the screen, and adjust until it shrinks to its smallest point. Infinity markings on lenses are approximations; the shrinking dot is the truth.
Focus before dark. Arriving at blue hour, the planning habit from the golden hour guide, means focusing while there is still light to focus by, then leaving it alone.
Making It a Habit
Shoot one block, three brightnesses. Photograph the same street at blue hour, full night, and after the shops shut. The same lights carry three different scenes, and the comparison teaches how much the ambient level decides.
Practice bracing before you need it. Spend one session shooting only from found supports, ledges, bins, railings, no tripod allowed. The inventory of stable surfaces you start noticing is the real equipment.
Take the same scene handheld and braced. One frame each, side by side afterwards. The difference is the entire argument of this page made visible in your own pictures.
The three controls doing the work here are explained from zero in our photography guide for beginners; night is simply where they stop being optional.
FAQ
Do I need a tripod for night photography?
For starfields and multi-second city exposures, yes or a solid substitute: a wall, a ledge, anything stable plus the shutter timer. For lit streets and phone night modes, bracing against something is often enough. What no technique replaces is stillness itself.
Why are my night photos blurry?
Almost always camera movement during a long exposure. Check the corners: if everything is equally smeared, the camera moved. Support it, use the timer, and if handheld, let the shutter speed rise even at the cost of a noisier image.
Why do the lights look blown out in my night shots?
Automatic metering brightened the darkness and overexposed the lights on the way. Expose for the bright sources, tap them on a phone, and let the night stay dark. A night scene is supposed to be mostly dark.
Can I do night photography with a phone?
Yes, and modern night modes are genuinely good at still scenes: they stack many short exposures into one clean image. Brace the phone, keep it still for the whole capture, and tap the brightest important element to protect it. Stars remain the hardest case and reward a camera with manual control.
Why can I see so few stars in my photos?
Usually light pollution, not settings. Artificial light scattered in the sky washes out faint stars for the camera just as it does for your eyes. The fix is distance from city glow, and checking the moon: a bright moon drowns stars as effectively as a town does.
What is the best time for city night shots?
Blue hour, the short stretch after sunset when the sky holds deep blue. Buildings get a backdrop instead of a black void, and artificial lights balance the remaining daylight. Arrive before sunset, focus while you can see, and work through the window.