
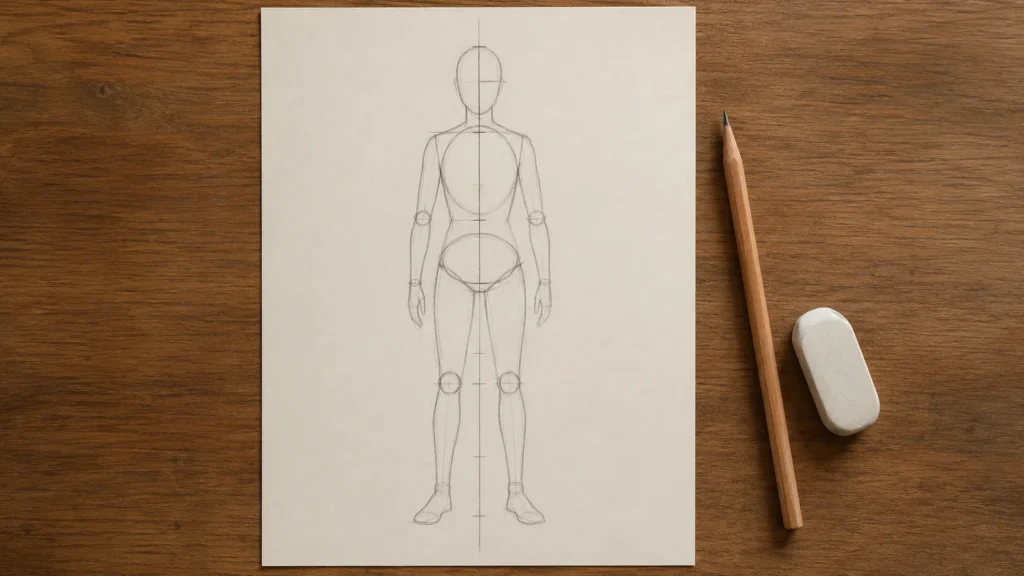
A human body is not hard to draw. It is hard to draw in proportion, and proportion is arithmetic, not talent. This guide uses one measuring unit, the head, to build a whole standing figure in eight steps: seven and a half heads tall, hips at the halfway mark, and a line of balance that stops the figure from looking like it is falling over.
This is the figure guide in our drawing series. If you want something smaller to warm up on, the easy drawing ideas hub has short subjects, and how to draw a dog uses the same build-from-shapes approach on four legs instead of two.
One Link for Your Sketchbook
A short address you control, pointing to your drawings, your pages and everything else you share.
Why Your Figures Look Wrong (Start With Proportion)
Draw a person from memory and something feels off, but you cannot name it. The head is usually too big. The legs start too high. The arms stop at the waist. None of those are drawing errors in the sense of a shaky line; they are measurement errors, and measurement can be fixed with a method.
Here is the useful part: your eye already knows what a person looks like. It has seen millions of them. What your hand lacks is a way to check itself while drawing. That is what a proportion system gives you. You stop asking "does this look right?" and start asking "is this mark where the count says it goes?" The first question is a matter of taste and mood. The second has an answer.
Everything below uses light pencil. Press hard enough to see, soft enough to erase without a ghost. The construction lines are scaffolding and they come down at the end.
The Head Is Your Ruler
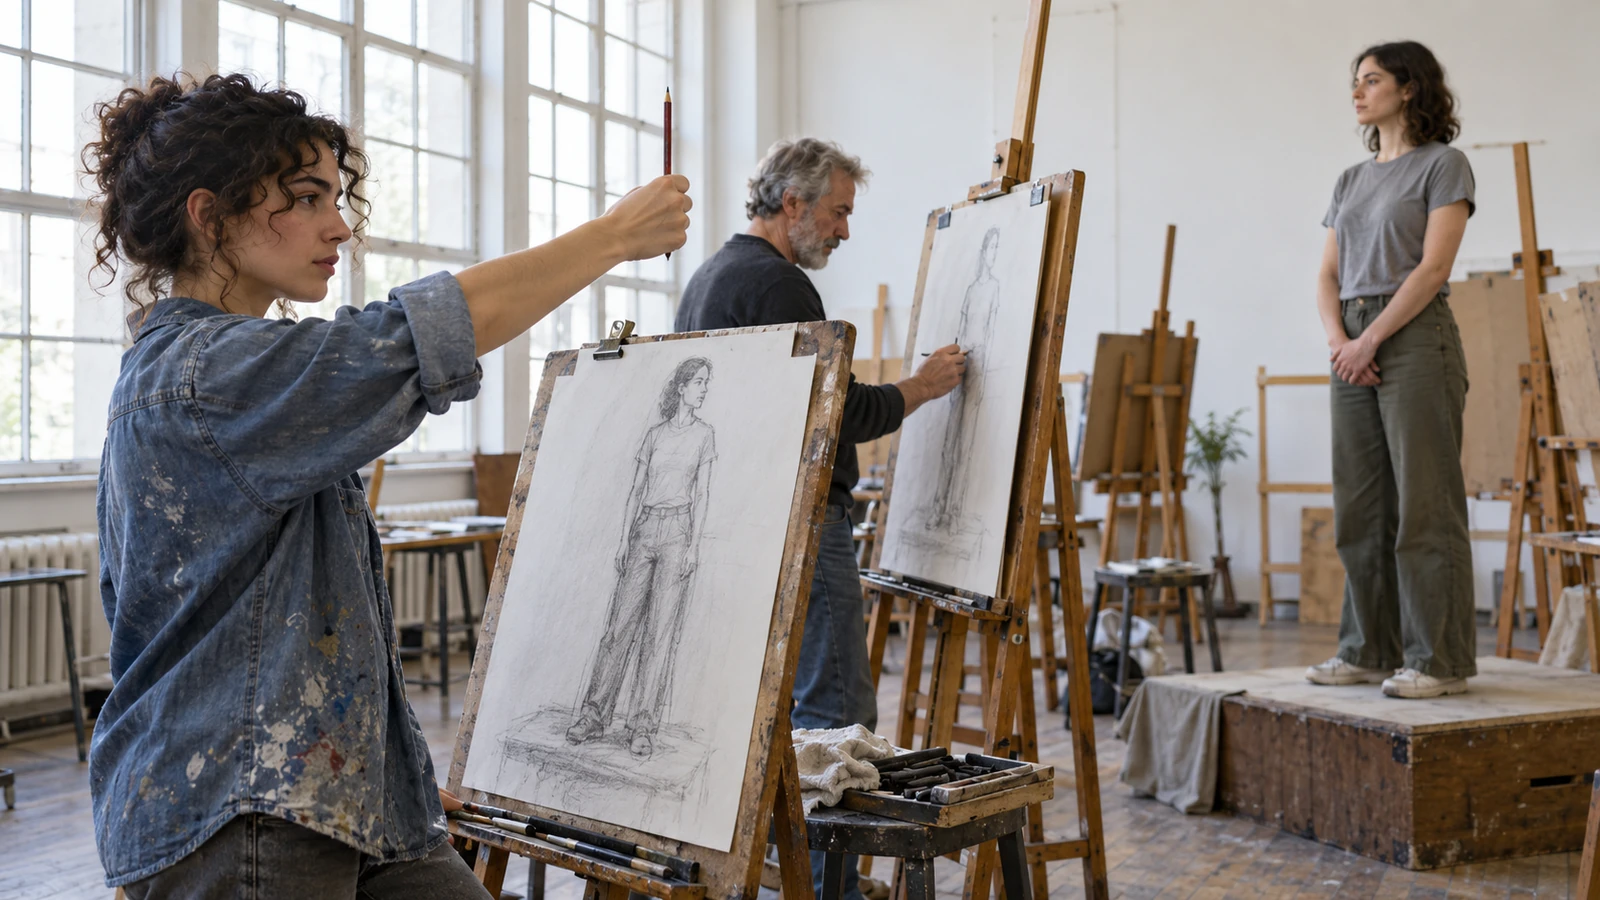
This guide uses head-lengths as a simple drawing unit, and the reason to use it is that it scales. A figure drawn small and a figure drawn across a whole page use the same counts, so you never need a real ruler and your figures stay consistent from sketch to sketch.
The convention this guide uses:
| Figure type | Total height in heads | Reads as |
|---|---|---|
| Realistic adult | 7.5 | an ordinary person |
| Heroic or fashion figure | 8 to 8.5 | taller, more idealized |
| Child around age six | about 6 | bigger head, shorter legs |
| Toddler | about 4 | very large head |
| Stylized cartoon | 2 to 4 | deliberately cute |
These are drawing conventions, not medical measurements, and real people vary in every direction. Treat 7.5 as a default that produces a believable figure, not as a rule about human bodies. The moment you understand the count, breaking it on purpose becomes a style choice instead of an accident.
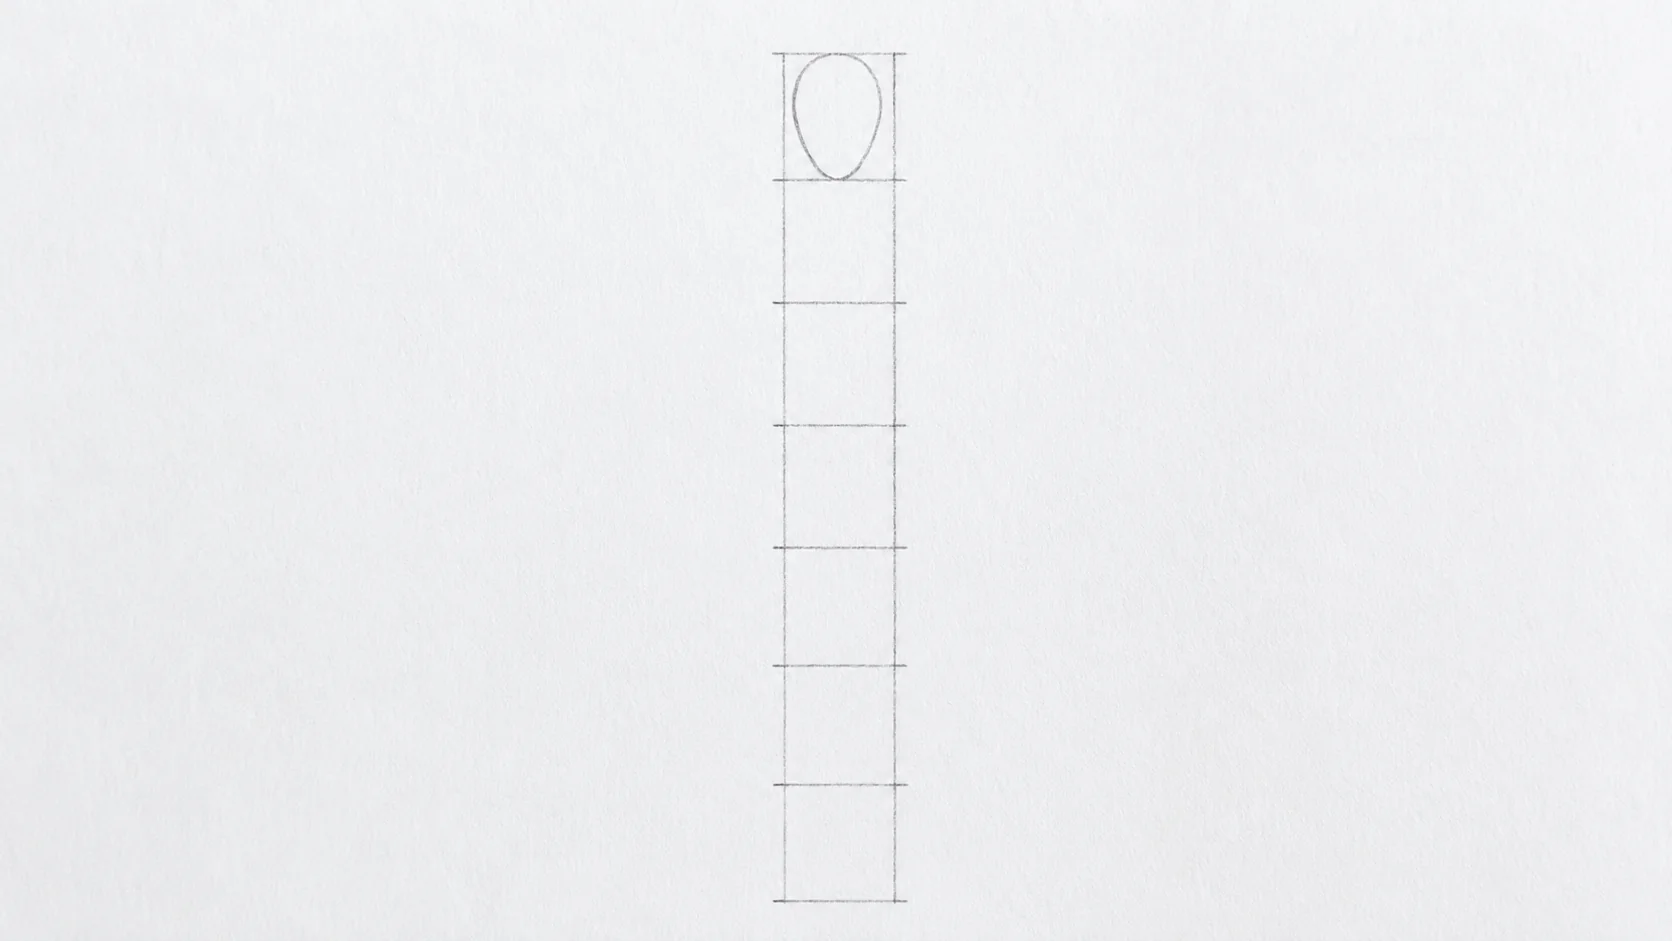
Step 1: The Vertical Line and Eight Marks
Draw a light vertical line down your page. This is the full height of your figure, so leave a margin at the top and bottom.
Now divide it. Do not measure with a ruler; halve it by eye, then halve each half, then halve again. Three rounds of halving gives you eight equal segments. Use the halfway check instead of estimating each eighth by eye. Number the marks 0 at the top through 8 at the bottom.
Your figure will be seven and a half segments tall, so the feet land halfway between mark 7 and mark 8. That leftover half segment at the bottom is deliberate breathing room.
Step 2: Head, Ribcage, Pelvis
Three masses carry the whole figure. Everything else hangs off them.
The head fills segment 0 to 1. Draw it as an egg, narrow end down. Not a circle: a circle gives you a baby face on an adult body.
The ribcage runs from about mark 1.5 to mark 3. Draw it as an oval, wider than the head and tilted slightly forward. Its top edge is roughly where the collarbones sit, a little below the chin.
The pelvis sits from about mark 3.5 to 4.5. Draw it as a smaller shape, roughly a squashed box or an upside-down triangle with the corners rounded off.
The gap between ribcage and pelvis is the waist, and it is a gap on purpose. Beginners draw the torso as one solid block, which is why their figures cannot bend. Two masses with a flexible space between them can twist, lean and slouch.
Note where mark 4 falls: right around the hip joint, and that is the vertical middle of the body. Not the waist. The proportion error to fix first is putting the halfway point at the waist, which makes legs too short and torsos too long.
Step 3: The Line of Balance
This step takes ten seconds and it is the difference between a figure that stands and a figure that appears to be tipping over.
Find the pit of the neck, the small hollow between the collarbones. Drop a straight vertical line from it, straight down the page, ignoring the pose entirely.
For a figure standing on both feet evenly, that line lands between the feet. For a figure standing with weight on one leg, that line must land on or very near the supporting foot. That is the rule. If your line lands in empty air past the feet, the figure is falling, and no amount of good rendering will fix it.
Step 4: Shoulders and Hips as Two Tilting Bars
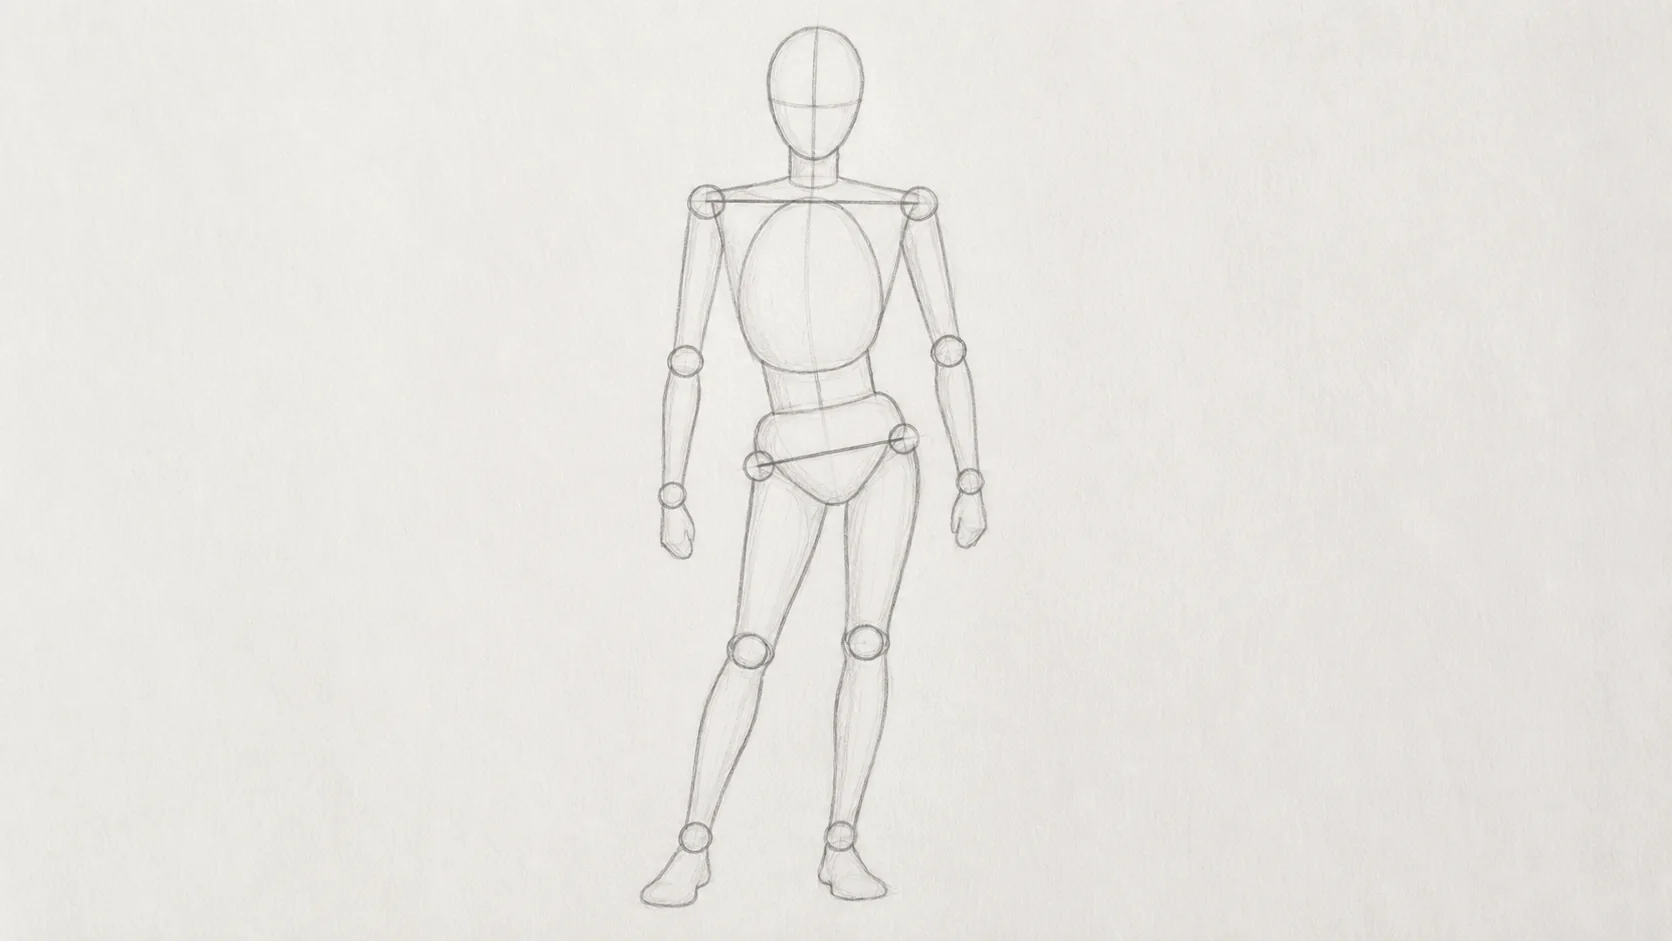
Draw a short bar across the top of the ribcage for the shoulders, and another across the pelvis for the hips. Adult shoulders run roughly two head-widths across; hips are usually a little narrower on a male figure and roughly equal or wider on a female figure.
Here is where a stiff drawing becomes a natural one. If the figure is standing with weight on one leg, tilt those two bars in opposite directions. The hip on the weight-bearing side rides up, and the shoulder on that same side drops. Two opposing tilts, and the spine curves gently between them.
Use that opposition to make the pose read as more relaxed. Keep the bars parallel and you get a figure at military attention, which is a valid choice but rarely the one you wanted.
Keep the Whole Sketchbook Behind One Link
Your studies, your finished pieces and everything else you share, at one short address.
Step 5: Legs, With the Knee at the Halfway Point
Legs run from the hip bar at mark 4 down to the feet just above mark 8. Two landmarks make them believable:
- The knee sits halfway between hip and heel, which puts it near mark 6.
- The thigh is slightly longer than the lower leg, so nudge the knee a hair below true center rather than above it.
Draw each leg as two tapering tubes with a small circle at the knee. Thighs are thickest near the hip; calves bulge on the outside of the lower leg. Feet are longer than they look from the front. Drawn head-on a foot reads as a short wedge, but the moment the figure turns even slightly, that foot is close to one head-length long. Short feet are the reason a figure can look pinned to the ground.
Step 6: Arms, and Where the Hands Actually Fall
Arms are the landmark to check most carefully, because feel says "about waist length". They are longer than that.
Two landmarks settle it:
- The elbow lands at roughly the waist, near mark 3, close to the bottom of the ribcage.
- The wrist lands at roughly the hip joint, near mark 4, and the fingertips reach down to about mid-thigh.
Say that last part out loud: with arms hanging relaxed, your fingertips reach the middle of your thigh. Check it on yourself right now. A drawing that stops the hands at the hip looks subtly stunted.
Draw arms as two tapering tubes with a circle at the elbow, same as the legs. For hands at this stage, a simple mitten shape is enough, sized a little smaller than the face. Hands deserve their own study; do not let them derail this drawing.
Step 7: Commit the Outline
You now have a scaffold of ovals, bars and tubes that is correctly proportioned and correctly balanced. Time to draw the actual person.
Press a little harder and trace a single continuous contour around the whole construction, smoothing the joins. Where two shapes meet, do not draw the seam; flow past it. The outline should cross your construction lines constantly rather than tracing them exactly, because a real body is one connected surface, not a bag of parts.
Then erase the scaffolding. Lightly, and only once the outline is confident.
Step 8: The Face, Last and Smallest
Faces come last because a face drawn early makes you protective of a drawing whose proportions are not settled yet.
On the head egg, draw a horizontal line across the middle. Eyes go on that line, not above it. That is the second great surprise of figure drawing: the eyes sit at the vertical midpoint of the head. Keep them on the midline used in this construction; placing them higher enlarges the forehead.
From there: the bottom of the nose sits about halfway between the eye line and the chin, and the mouth about a third of the way from nose to chin. Ears run from the eye line down to the bottom of the nose. Eyes are spaced about one eye-width apart.
At small sizes, stop early. A figure the height of your hand needs two dots and a line, not eyelashes. Detail that the scale cannot carry reads as noise.
Six Mistakes That Make a Figure Look Wrong
| What went wrong | Why it happens | The fix |
|---|---|---|
| Head too large | Drawing the head first, at a comfortable size, then fitting the body under it | Mark total height first, then make the head exactly one segment |
| Legs too short | Putting the body midpoint at the waist | Midpoint is the hip joint, mark 4 |
| Arms too short | Stopping the hands at the hip | Fingertips reach mid-thigh; wrist at the hip |
| Figure looks like it is falling | No balance check | Drop the line from the neck pit; it lands on the supporting foot |
| Stiff, robotic pose | Shoulder and hip bars parallel | Tilt them in opposite directions |
| Eyes too high, forehead huge | Assuming eyes sit high on the head | Eyes go on the horizontal midline of the head |
Change the Numbers, Change the Person
The count is a dial, not a cage. Adjust it deliberately and you get different people out of the same method:
- A child: drop to about six heads and keep the head near adult size. Large head, short limbs, higher midpoint. For a more childlike stylized figure in this guide, use the shorter head-count construction.
- A tall, elegant figure: go to eight or eight and a half heads and put the extra length in the legs, below the hip mark, never in the torso.
- A stocky, powerful figure: keep 7.5 but widen the ribcage and shoulders and shorten the neck.
- A cartoon: drop to three or four heads, enlarge the head hard, and simplify hands and feet into mittens and wedges.
Same scaffold, four different people. That is the payoff of building on a count instead of guessing.
Show the Figures You Are Proud Of
One VisuLink holds your sketchbook, your pages and everything else you share.
FAQ
How many heads tall should a human figure be?
Seven and a half heads is the standard drawing convention for a realistic adult, and it is the default this guide uses. Eight to eight and a half reads as a taller, more idealized figure, and around six reads as a child. These are drawing conventions rather than measurements of real bodies, which vary a great deal.
Where is the middle of the human body when drawing?
At the hip joint, not the waist. On a seven and a half head figure this falls at the fourth head mark. Placing the midpoint at the waist is the error to fix first, because it makes the legs look too short.
How long should the arms be?
With arms hanging relaxed, the elbow is roughly level with the waist, the wrist is roughly level with the hip joint, and the fingertips reach about the middle of the thigh.
Why do my drawn people look like they are falling over?
Because there is no balance line. Drop a vertical from the pit of the neck straight down the page. For a figure resting weight on one leg, that vertical has to land on or very near the supporting foot. If it lands outside the feet, the pose is physically unbalanced.
Should I draw the face first?
No. Draw it last. A face drawn early makes you reluctant to fix the proportions underneath it, and proportion is what decides whether the figure works. Build the scaffold, commit the outline, then add the face.
Do I need to learn anatomy to draw people?
Not to start. Proportion and balance carry a figure a long way before muscle detail matters. Anatomy becomes useful once your figures are consistently well measured and you want them to feel solid rather than merely correct.
References
- Wikipedia: Body proportions. Summarizes the drawing convention of 7.5 heads for an average figure, 8 for idealized and 8.5 for heroic.
- Britannica: Contrapposto. Defines contrapposto, the weight-on-one-leg pose where hips and shoulders tilt for a relaxed, natural stance.
- Proko: How to Draw Balanced Poses. Figure drawing lesson on the balance line: drop a vertical and keep the supporting feet on it.