
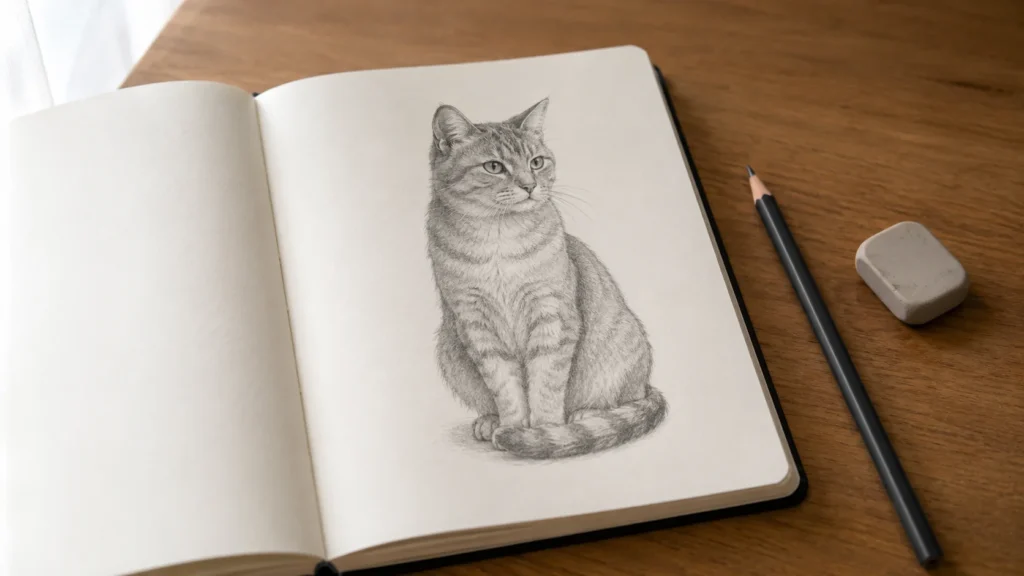
Two shapes, nine steps: a pear for the body, a circle for the head, and a sitting cat that actually looks like a cat. No talent required, no tracing, just a pencil held lightly and a method that puts the eyes, the ears and the tail where they belong.
This tutorial uses an original construction method, the same build-up logic as our how to draw a dog guide, but with a different skeleton, because a sitting cat is a different problem. If you want more subjects after this one, the easy drawing ideas hub has a full list.
One Link for Everything You Make
A short address you control, pointing to your sketches, your pages and everything else you share.
Why a Sitting Cat Is the Easy One
A cat sitting upright, facing you and turned a few degrees to one side, removes three of the four things beginners get wrong. The back legs are folded and mostly invisible, so you cannot misdraw them. The spine is a single vertical, so there is no arch to guess. And the face stays close to symmetrical, so you can measure one side against the other. Draw the sitting cat first; the walking cat is the same head on a harder body.
One rule carries the whole method: keep every line in steps 1 through 6 so faint it would vanish in a photocopy. Those are measuring lines, not drawing lines.
What You Need
One pencil, any paper, and an eraser you are actually willing to use. Nothing else. A second, softer pencil helps in step 8, but the whole cat can be built and finished with a single HB.
Step 1: The Pear
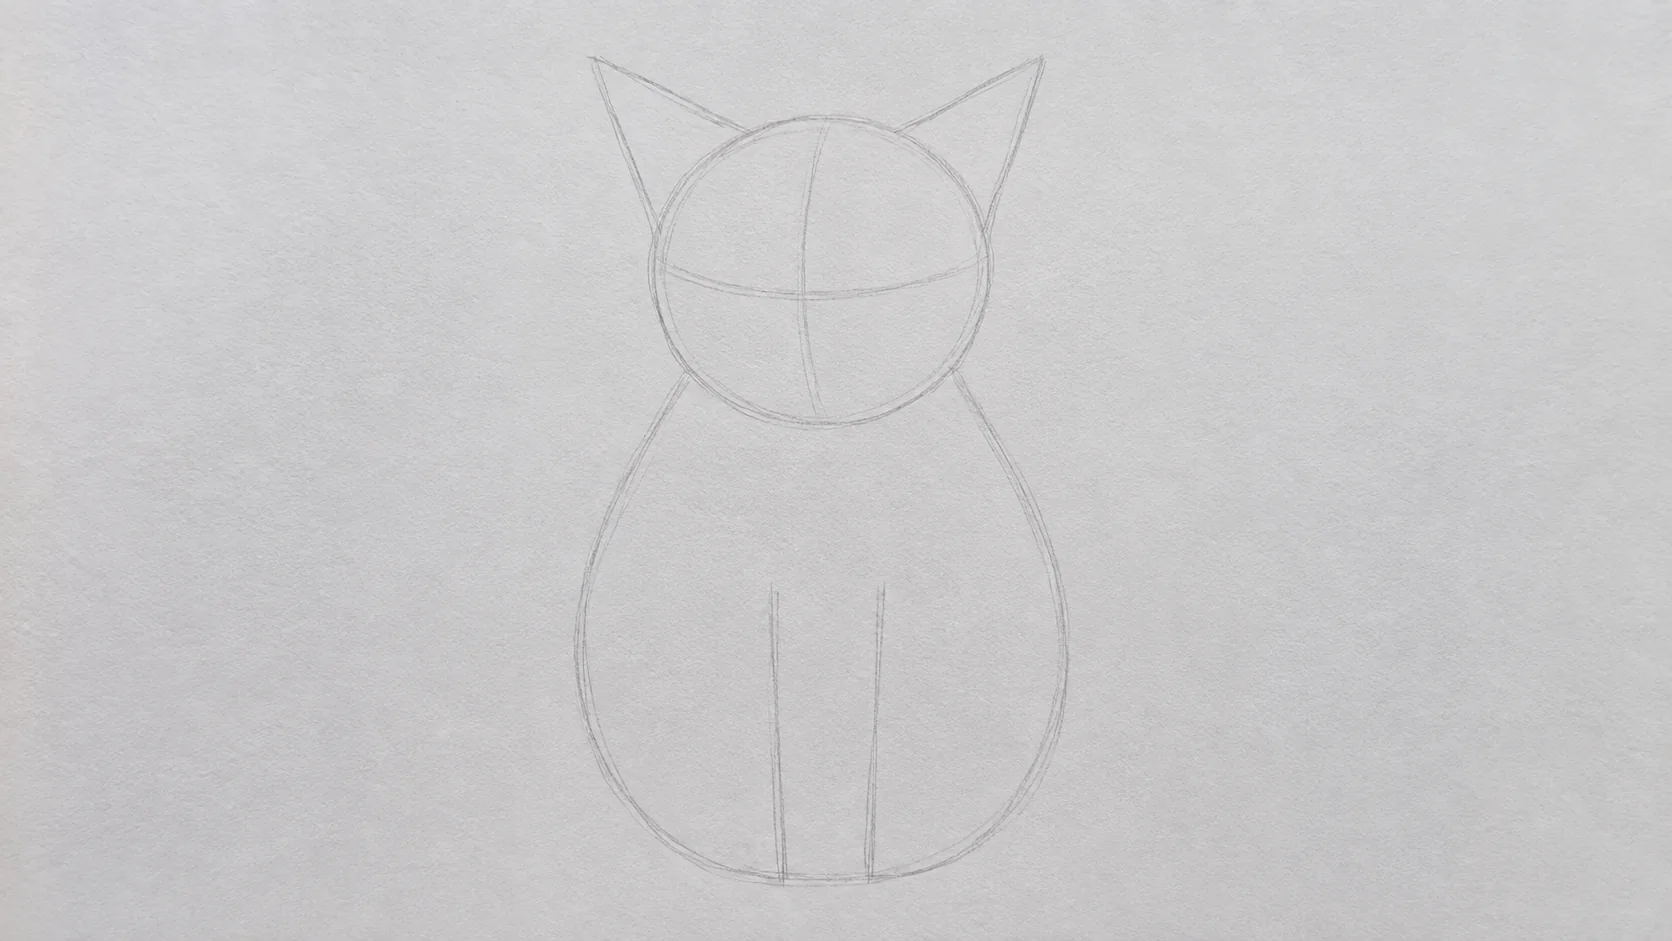
Draw one pear shape, narrow at the top, wide and heavy at the bottom, sitting flat on an invisible floor line. Make it about one and a half times as tall as it is wide. That is the whole body of a sitting cat: the chest tapering up to the shoulders, the weight pooled into the haunches at the base. If your cat keeps floating, draw the floor line first and sit the pear on it.
Step 2: The Head Circle
Sit a circle on top of the pear's narrow end, about two thirds the pear's width, overlapping it slightly so there is no gap. Cats have almost no visible neck when sitting; the head rests straight on the chest. Now nudge the circle a little to one side of center. That small offset is the whole three-quarter turn, and it is the difference between a cat and a symmetrical mask.
Step 3: The Cross on the Face
Inside the head circle draw two faint lines: a vertical down the middle, curving gently toward the side the head is turned to, and a horizontal across, placed below the circle's center, not on it. Beginners default to halfway, which lifts the eyes too high and produces a human face inside a cat outline. Low horizontal, wide-set eyes, small forehead: that is the cat proportion.
Step 4: Ears by the Clock
Treat the head circle as a clock face. Put the base of one ear at roughly ten o'clock and the other at two o'clock, then draw each ear as a triangle whose tip leans slightly outward, away from the center line. Make them large: each ear about as tall as the distance from the eye line to the chin. Then, and this is the step most tutorials skip, draw a second, smaller triangle inside each ear, offset toward the outer edge. That inner triangle is what reads as "cat" from across the room.
Step 5: The Front Legs and the Haunch
Down the front of the pear draw two straight, nearly parallel columns from the chest to the floor line, close together, roughly one head-width apart at most. They end in small rounded paws that sit on the floor line, not below it. On the side the body is turned toward, add one shallow curve low on the pear: the haunch, the folded back leg pressing outward. Nothing else of the back legs is visible, and that is correct. The sitting pose hides the hard part.
Step 6: The Tail Curve
One line, one decision. Draw a single curve leaving the base of the pear on the side you turned the head away from, sweeping out and forward so it wraps around the front paws, then thicken it into a tapering tube. A tail that curls toward the viewer makes the cat look settled; a tail flicked straight out behind makes it look about to move. Do not draw the tail as a stick and thicken it later: draw the curve you mean, then give it width evenly along its length.
Turn Your Sketchbook Into a Gallery
Collect your drawings on one page and share a single short link with anyone.
Step 7: The Face, Almond Eyes, Triangle Nose
On the horizontal line, draw two almond shapes, tilted so the outer corners sit higher than the inner ones, with one full eye-width of space between them. Inside each, a tall narrow oval pupil, and one tiny patch left white for the glint. Where the vertical line meets the eye line, drop down about half an eye-height and draw a small downward-pointing triangle for the nose. From its bottom corner, two short curves out and down make the muzzle, like a very wide letter W lying under the nose. The mouth is a small line under the center of that W and nothing more.
Step 8: Commit the Outline
Now press harder. Trace the drawing you have built with a confident darker line, following the pear and circle but not slavishly: let the line dip in slightly at the shoulders, bulge over the haunch, and round out at the chest. Where the head circle meets the pear, draw through the join so head and chest become one continuous silhouette. Then erase every faint construction line you can still see. If the cross on the face is still visible at the end, step 3 was drawn too dark.
Step 9: Stripes, Whiskers, Stop
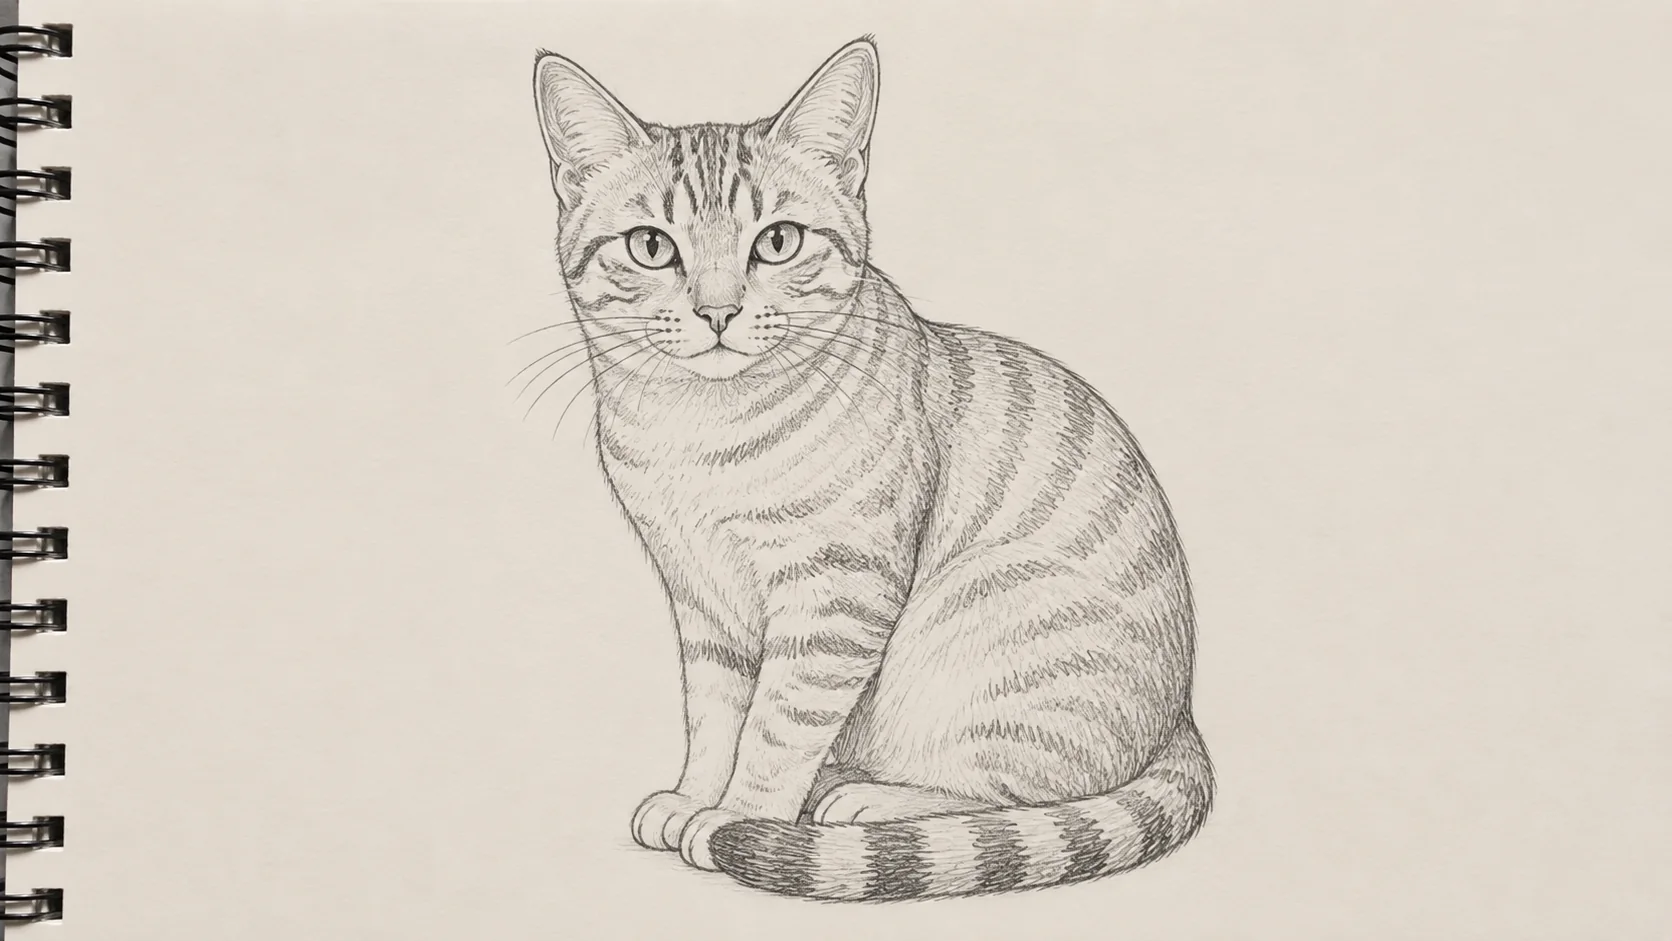
Three finishing passes, in this order. First, break the outline: add small notches of fur along the cheeks, the chest and the tail tip so the edge stops looking like wire; everywhere else the line stays smooth. Second, stripes, if you want them: stripes wrap across the body, following its round form, never running lengthwise. A few on the tail, a few on the flank, a soft M on the forehead. Half a dozen well-placed marks beat forty. Third, whiskers: long, single, confident strokes from the muzzle, three or four a side, fanning outward and drooping slightly. Draw each one in a single fast movement; a hesitant whisker is a visible whisker.
Then stop. A clean silhouette with the ears right and the eyes in the right place already reads as a cat. Nothing after that adds much, and most of it subtracts.
Five Mistakes That Make a Cat Look Wrong
1. Eyes placed halfway up the head. The single most common one. Cats have a small forehead and a low eye line; halfway up turns the cat into a person.
2. Ears too small and too vertical. Small upright ears read as a bear or a mouse. Cat ears are big, sit wide on the skull, and lean outward. An ear without the inner triangle stays flat.
3. A visible neck. A gap or a tube between head and body is the classic "cat made of a snowman" look. Sitting cats have the head resting on the chest.
4. A tail drawn as a stick. A tail with no taper and no width looks like a wire glued on. Give it thickness and let it thin toward the tip.
5. Construction lines that survived. If the cross, the pear or the circle still shows in the finished drawing, the first six steps were pressed too hard. They are supposed to disappear.
Change Three Things, Get a Different Cat
Same nine steps, different animal. Make the pear wider and shorter and the head circle bigger relative to it, and you have a kitten. Round the ears and widen the cheeks for a heavy, fluffy cat. Stretch the pear taller and narrower with very tall ears for a lean, alert one. Offset the head circle further to one side, hiding part of one ear, and the turn deepens. Draw the same cat four ways before you draw a new animal; the method sinks in faster through variation than through repetition.
Show the World the Day-Thirty Cat
Post your progress to one page that holds every drawing you are proud of.
FAQ
What is the easiest way to draw a cat for beginners?
A sitting cat built from two shapes: a pear for the body and a circle for the head. The pose hides the back legs, keeps the spine vertical and keeps the face symmetrical, which removes most of what usually goes wrong.
Where do the eyes go on a cat's face?
Below the middle of the head, on a horizontal line drawn under the circle's center. A cat has a small forehead and a low, wide eye line; placing the eyes halfway up is what makes a drawing read as human.
How do you draw cat ears so they look right?
Base them at ten o'clock and two o'clock on the head circle, make each one about as tall as the distance from eye line to chin, lean the tips slightly outward, and add a smaller triangle inside each ear. Size, placement and that inner triangle do all the work.
Why does my cat drawing look like a dog?
Almost always the muzzle and the ears. A dog's muzzle projects forward; a cat's is short and wide, just a small triangle nose over a wide W. Dog ears hang or fold; cat ears are tall triangles set wide on the skull.
How do I draw the tail without it looking stuck on?
Start the curve from inside the body silhouette, not from its edge, sweep it around the front paws in one decision, and give it even width that tapers at the tip. A stick that gets thickened afterwards always shows.