
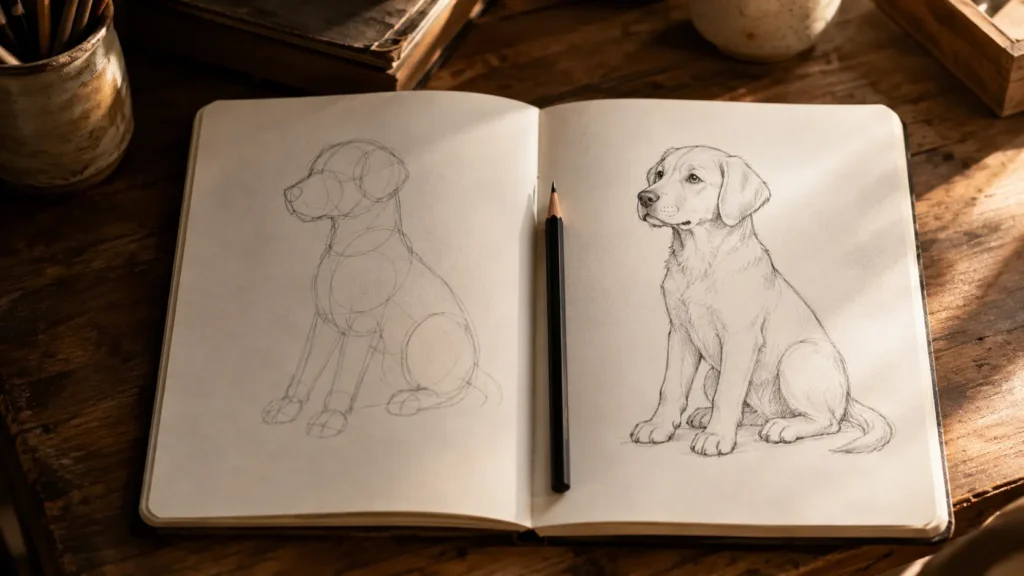
Every dog you can draw starts as three circles. One for the head, one for the chest, one for the hindquarters. Connect them, hang legs from the bottom, and the hard part of drawing a dog, getting the proportions to feel dog-like, is already done before any detail exists.
This is a build-up method, not a trace-this-picture tutorial: six steps that go from loose shapes to a finished pencil dog, the same construction professional animal sketchers use. It works for a sitting labrador and a running mutt alike, because you learn the structure, not one frozen pose.
One Link for Everything You Make
A short address you control, pointing to your sketches wherever they live.
Before You Start: Pencil Light, Eraser Ready
The whole method depends on one habit: draw the first four steps so lightly you can barely see them. These are scaffolding lines, meant to be erased or drawn over. Press hard at the start and the construction lines survive into the finished drawing like bones poking through.
Any pencil works; an HB or 2B and any paper are enough. Give yourself a drawing area at least the size of your hand, small dogs cramp.
Step 1: Three Circles
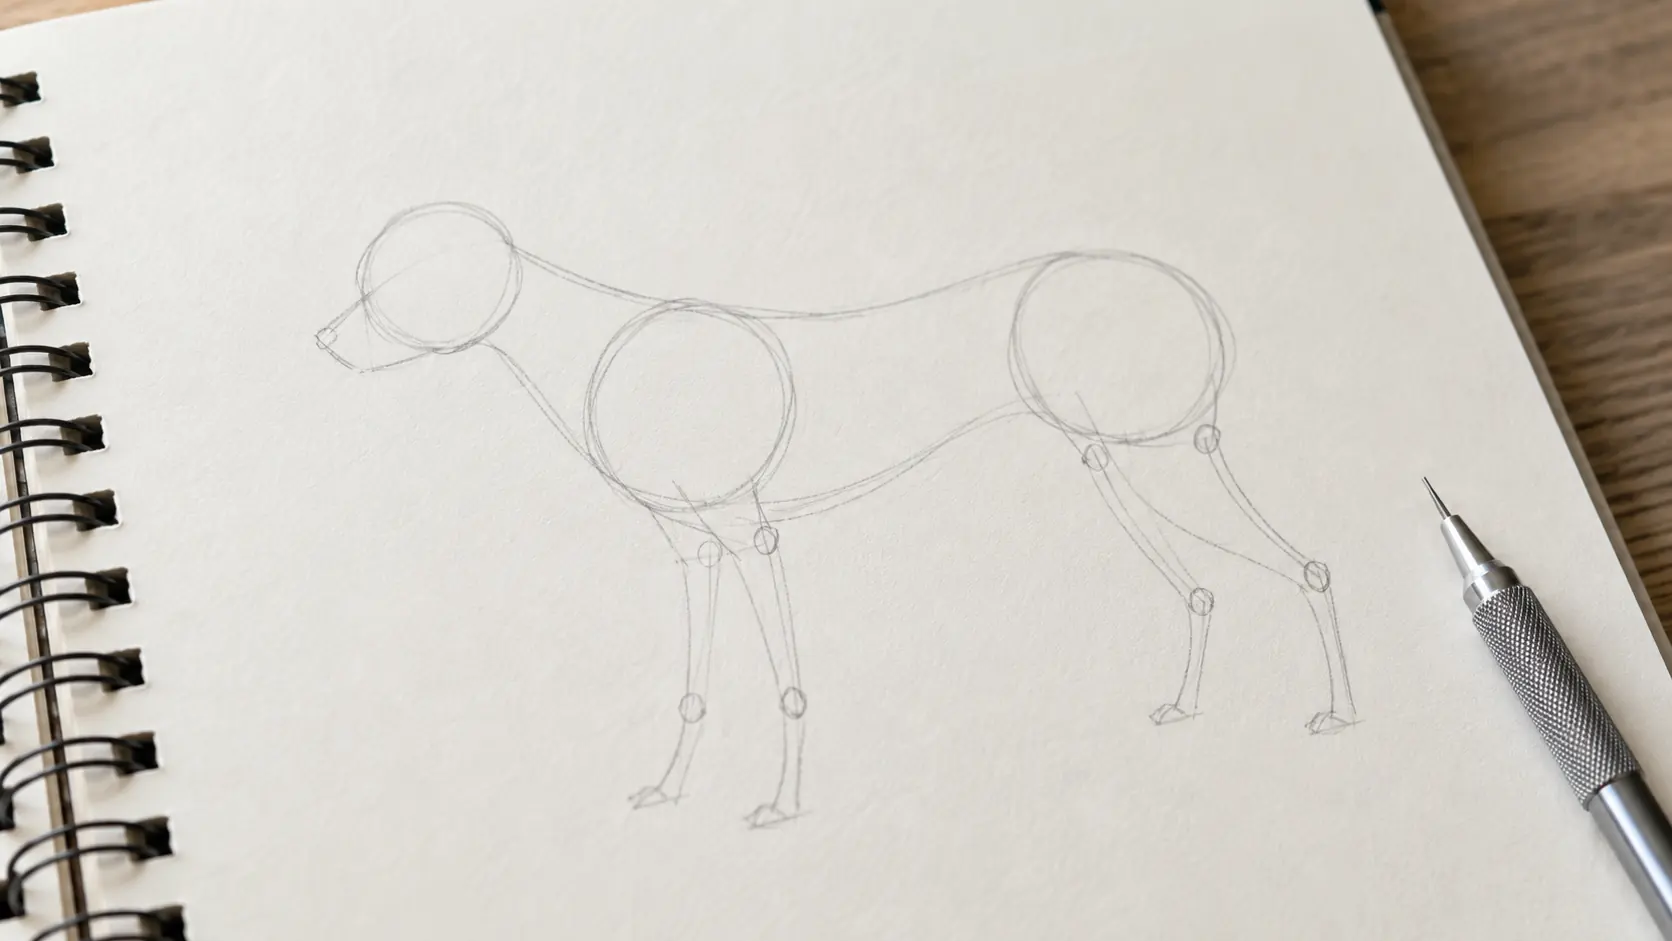
Place three light circles: a medium one for the chest, a slightly smaller one for the hindquarters a bit behind and lower, and a small one for the head, up and to the front. For a standing dog in side view, the chest and hip circles sit at the same height with a gap about one circle wide between them; the head floats above the gap between chest and front.
These three circles ARE the drawing. Nudge them until the arrangement already suggests a dog standing, sitting, or stretching, before you commit to anything else. Bigger head circle: puppy. Long gap between chest and hip: dachshund energy. The pose lives here.
Step 2: Connect the Body
Join the shapes with two flowing lines: one along the top, from the back of the head, dipping slightly at the neck, over the chest circle, sagging a touch in the middle, rising over the hip circle and ending in a tail line; one along the bottom, from the chest circle's underside, lifting toward the belly, into the hindquarters. Dogs are not sausages: the chest hangs lower than the belly, and that tuck-up toward the back legs is one of the details that quietly makes a drawing read as dog.
Step 3: Legs Are Sticks First
Hang four light stick lines with small circles at the joints: front legs from the chest circle, nearly vertical, with a joint bump backward at the wrist; back legs from the hip circle with the signature zigzag, thigh forward, hock backward, foot forward. Feet are small ovals, toes come later.
The classic beginner error is legs too thin and too straight, table legs under a dog body. Follow the stick with a second light line to give each leg thickness: thick at thigh and shoulder, slimmer below the joints.
Turn Your Sketchbook Into a Gallery
One link collects your pages, your process shots and where people can follow you.
Step 4: The Head, Muzzle and Ears
On the head circle, attach a smaller rounded box for the muzzle, low on the circle for most breeds. A light cross on the head circle, one vertical line for the center of the face, one horizontal for eye level, keeps the features from drifting. The nose caps the muzzle; the mouth is a soft W hanging under it.
Ears define breed more than anything else: two triangles standing up reads shepherd; folded triangles read terrier; long rounded flaps hanging past the jaw read beagle or labrador. Draw the ear shape you want your dog to have, attached at the top rear of the head circle.
Step 5: The Real Outline
Now press a little harder and draw the actual dog in one cleaner line over the scaffolding: over the skull, down the muzzle, around the chest, along the belly with its tuck-up, around the haunches, down the legs with their thickness, around the feet. Where the construction lines disagree with your eye, trust your eye, the scaffolding was advice, not law.
Then erase the visible construction lines, or most of them. A few surviving light lines look like confident sketching; a full grid of circles looks like homework.
Step 6: Fur, Face and Finish
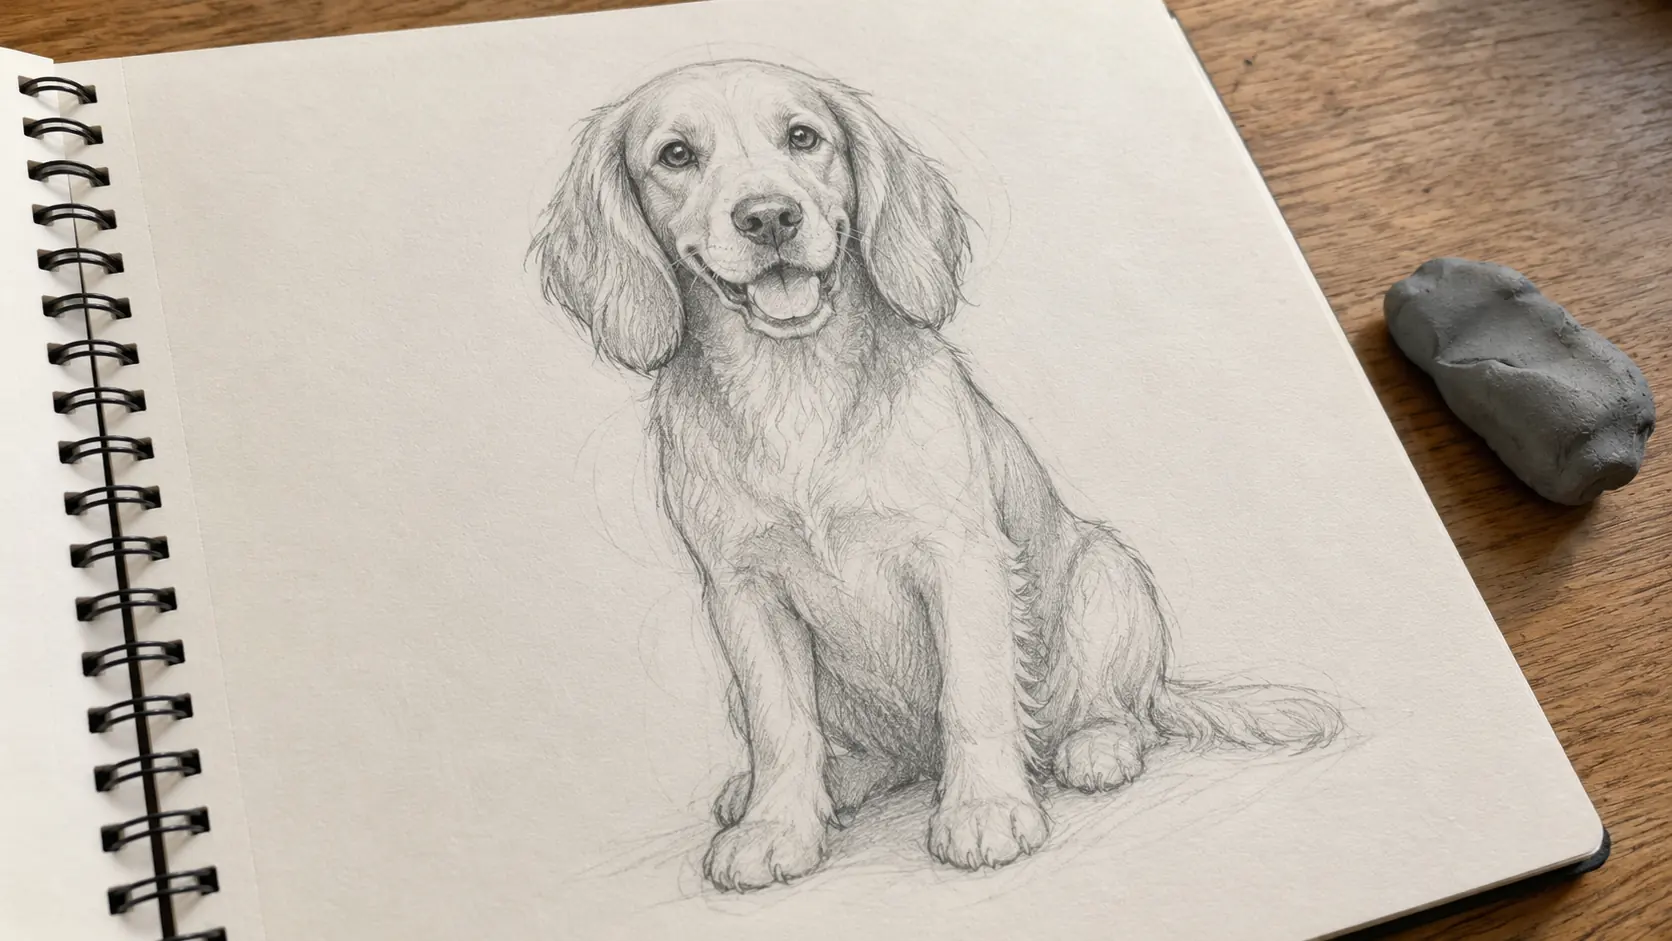
Eyes: ovals with a flat top read calmer and more dog-like than perfect circles; leave a tiny white unshaded spot in each for life. Nose: darkest thing in the drawing, with a small highlight. Fur: do not draw every hair; shade the shadow areas, under the chest, behind the legs, under the ears, with short strokes in the direction the fur grows, and let the paper stay clean where light hits the back and head. Short strokes for a short-haired dog, longer lazier strokes for a fluffy one.
Stop earlier than you think. A drawing with clean structure and three good shadows beats one buried under a thousand nervous fur lines.
Making It YOUR Dog
The construction is a recipe you can season. Puppy: bigger head circle, bigger eyes lower on the face, paws one size too big. Greyhound: stretch everything, deepen the chest, shrink the belly. Corgi: same circles, legs at half length. Sitting pose: hip circle drops to the ground line and the back legs fold into rounded triangles beside it. Draw the same dog three times this week, the pairs will teach you more than any tutorial, ours included. More warm-up subjects live in the easy drawing ideas list.
Show the World the Day-Thirty Dog
A VisuLink puts your gallery, your socials and your story behind one short address.
FAQ
What is the easiest way to draw a dog?
Build it from three light circles, head, chest, hindquarters, connect them with two body lines, hang stick legs with joints, then draw the real outline over the scaffolding. Structure first, details last.
How do I draw a dog's legs so they look right?
Sticks with joint circles first: front legs nearly straight with a wrist bump, back legs with the thigh-forward, hock-backward zigzag. Then thicken: wide at thigh and shoulder, slim below the joints. Straight thin table legs are the classic error.
How do I make my dog drawing look like a specific breed?
Mostly ears and proportions: upright triangles, folded tips or long hanging flaps change the breed instantly, and stretching or shrinking the head size, leg length and body gap turns the same construction into a puppy, a greyhound or a corgi.
Should I draw every hair when shading fur?
No. Shade the shadow zones with short strokes in the fur's direction and leave the lit areas clean. Suggested fur reads better than drawn fur, and overworking it is the most common way finished drawings go muddy.
Why do my construction lines show in the final drawing?
They were drawn too dark. Keep the first four steps barely visible, then commit with a darker line only at the outline stage, and erase the scaffolding that remains.