

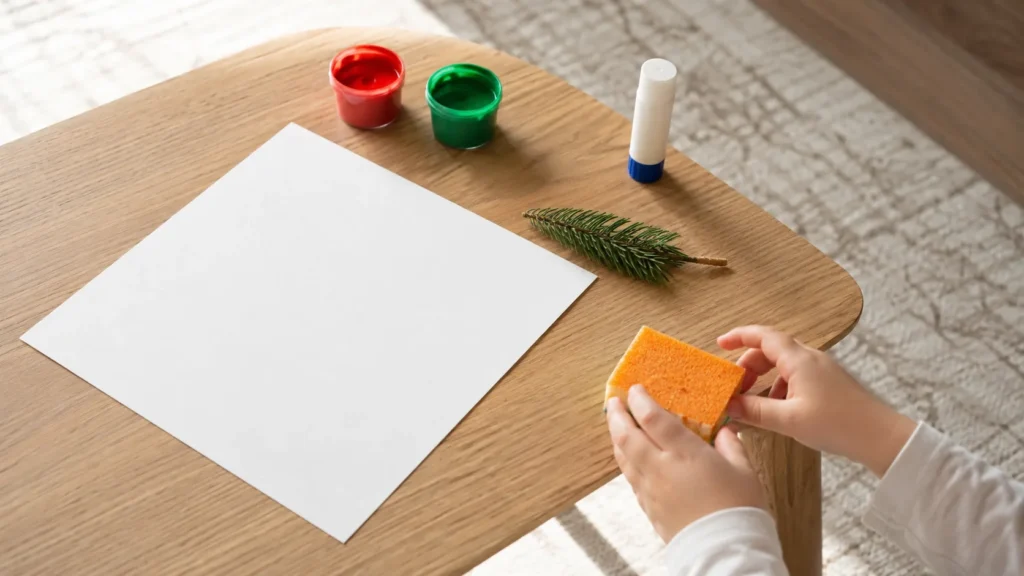
A Christmas craft for a three-year-old and a Christmas craft for a five-year-old are not the same project made smaller or bigger. What changes is what the hands are asked to do: press, dab, tear, then pinch, cut and wait for glue to hold.
The thirteen projects below are grouped by that demand, not by how they look when finished. Each one lists the materials, the steps, an honest estimate of time and mess, and which part belongs to the adult and which belongs to the child. The motifs are the plain ones: tree, star, reindeer, snowman, stocking, bell, wreath, lights. No characters, no kits, nothing to buy beyond what a supermarket and a recycling bin already hold.
One Link for the Whole Season
A short address you control, holding the photos of what they made this December, ready to send to the family in one message.
What the Hands Are Asked to Do
The age labels in this list describe the project, not the child. "Around three" means the project can be done with a whole hand, a sponge or a fingertip, with no cutting and no small pieces. "Around four" means it asks for a fingertip placed on purpose, a strip torn along a line, or a first straight cut with the adult holding the paper. "Around five" means it asks for scissors on a curve, a sequence of steps in order, or a wait while glue sets before the next layer goes on.
A child who is four may want the three-year-old projects and a child who is three may reach for the scissors. Both are fine. The grouping lets the adult pick a project whose demands match the child at the table today, and drop a level without anyone noticing if the first choice turns into frustration.
One honest note before the list. Penn State Extension's Better Kid Care programme, whose guidance runs through this article, says plainly that "crafts tend to limit a child's creative ideas," and that the best art for children is "to present the art materials and let them explore them in their own ways." A craft with a recognisable tree at the end sits in tension with that. These projects keep the tension small: the adult prepares the shape or the boundary, and everything inside it, colours, placement, how many dots, which way up, is the child's. If the child abandons the tree and paints the whole sheet green, that is not a failed project.
Safety by Material, Not by Warning
The items that make Christmas crafts look festive are the same items that Better Kid Care names as risks for young children. Their guidance lists "button batteries, magnets, plastic bags, styrofoam objects, coins, balloons, latex gloves, and glitter" among things that "pose a safety risk and should not be accessible to children under three."
On size, the same source is specific: "Young children can choke on small objects and toy parts. All items used for children under three years of age and any children who put toys in their mouths should be at least 1¼ inch in diameter and between 1 inch and 2¼ inches in length. Oval balls and toys should be at least 1¾ inch in diameter."
Notice the second condition. It covers any child who still puts things in their mouth, whatever their age. In practice, for this list, that rules out pompoms, sequins, beads, googly eyes, small bells and glitter from every project. None of them is used below. Where a project wants sparkle, it uses salt, which Better Kid Care itself suggests: "Add salt or sugar to make paint sparkle."
On paint and glue, the guidance is to consider "any safety factors, such as non-toxic materials and the ability to experience the process without injury." Choose paint and glue labelled as non-toxic and washable, and keep the quantities small. Better Kid Care also recommends this last point for a different reason: "Consider offering smaller quantities of paint so children can manage fewer spills and can mix colors without ruining large containers of paint."
Every project below uses some of: washable paint, paper and card, a glue stick, masking tape, a marker, child scissors with rounded tips, a sponge, cotton swabs, salt, paper plates, paper cups and a sprig of something green from outside.
Around Three: Whole Hand, No Scissors
Nothing in this group needs cutting by the child, and nothing is small enough to swallow. The adult's job is to prepare the sheet and hold it still. The child's job is to press, dab and smear.
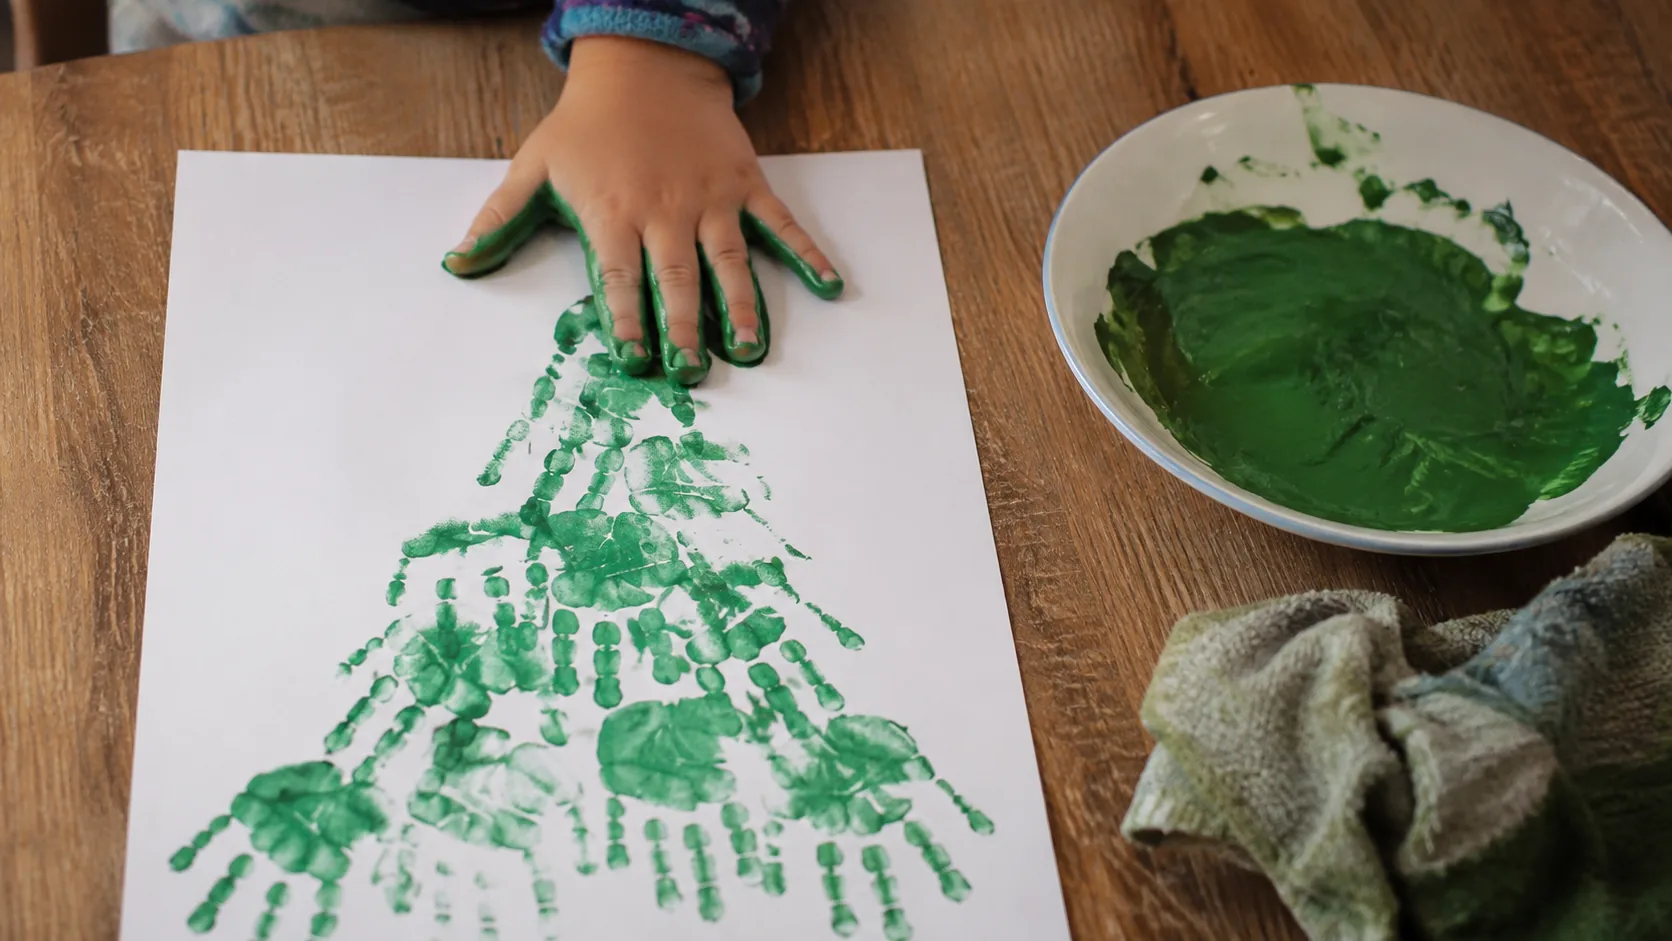
1. Handprint tree. Materials: one sheet of card, green washable paint on a flat plate, a fingertip's worth of red and yellow, a wet cloth. Steps: paint the child's palm and fingers green with a sponge (less mess than dipping). Press the hand at the bottom of the card, fingers pointing down. Repeat above it, slightly narrower, three or four rows, until the stacked prints make a rough triangle. Let the child dab red fingerprints on as baubles and one yellow print at the top. Time: about fifteen minutes, mostly waiting for the child to enjoy having a green hand. Mess: high on the hand, low on the room, if the cloth is ready before the paint. Adult: sponge, positioning, cloth. Child: pressing, dots, deciding when the tree is done.
2. Sponge-dab tree in a taped boundary. Materials: card, masking tape, green paint, a sponge cut into a chunk the child can hold in a fist. Steps: the adult lays three strips of masking tape on the card in a triangle. The child dabs green over the whole area, inside and over the tape. When the paint is dry, the adult peels the tape and a clean-edged tree appears. Time: ten minutes of dabbing, an hour of drying. Mess: medium. Adult: tape, peeling. Child: everything green. This one works because the child never has to stay inside a line; the tape does it later.
3. Salt-sparkle star. Materials: dark blue or black card, a bowl of white paint, a thick brush, a salt shaker. Steps: the adult draws a large, simple star in pencil, or skips the outline entirely. The child paints the star or the whole sky. While the paint is still wet, the child shakes salt over it. Let it dry flat and tip the loose salt into the bin. Time: ten minutes. Mess: the salt travels; a tray under the card catches most of it. Adult: outline if wanted, tray. Child: paint, salt. This is the glitter project without glitter.
4. Pine-sprig printing. Materials: a sprig of pine, fir, rosemary or any leafy branch from outside, green paint on a plate, large paper. Better Kid Care lists "pine tree branches" and "twigs, sticks, or leaves" among painting tools worth trying. Steps: dip the sprig in the paint and press or drag it on the paper. Repeated prints in a ring make a wreath; stacked prints make a tree; scattered ones make a forest. Time: as long as the sprig holds up. Mess: low. Adult: pick a sprig with no thorns and no berries. Child: all of it.
5. Paper-plate snowman. Materials: two paper plates, one smaller than the other if you have them, tape, a marker, a strip of coloured paper for a scarf, glue stick. Steps: the child scribbles or paints on both plates if they want them whiter or not white at all. The adult tapes the small plate above the large one from behind. The child draws the face and buttons with the marker, and glues the scarf strip across the join. Time: fifteen minutes. Mess: low. Adult: taping. Child: face, buttons, scarf, and naming it.
Keep the Green Hand Photo
Photograph the print and the hand that made it, and keep both behind one address you can share with grandparents.
Around Four: Fingertips, Dabbing and First Cuts
The projects in this group ask for a fingertip or a cotton swab placed where the child intends, a strip torn along a fold, or one straight cut with the adult holding the paper steady. Nothing yet asks for scissors on a curve.
6. Fingerprint string lights. Materials: white or black card, a marker, washable paint in three or four colours on a plate. Steps: the adult draws a loose wavy line across the card, or two. The child dabs a fingertip in one colour and presses it under the line, then the next colour, along the whole string. A dark background makes the colours look lit. Time: ten minutes. Mess: fingertips only. Adult: the line. Child: which colours, how many, how close.
7. Cotton-swab wreath on a paper plate ring. Materials: a paper plate, cotton swabs, green paint in two shades, a little red. Steps: the adult cuts the centre out of the plate so a ring remains. The child dots green around the ring with the swab, holding it like a pencil, then adds red dots as berries. A strip of paper folded into a bow can be glued at the bottom. Time: fifteen minutes. Mess: low. Adult: the ring. Child: every dot. This wreath stays flat and goes on the fridge or a wall; it is a picture, not an ornament to hang from a branch.
8. Handprint reindeer. Materials: brown card or a brown paper bag, a marker, red paper, glue stick, pencil. Steps: the adult traces the child's two hands on brown paper and cuts them out, or the child tears roughly around the outline. The adult draws a simple oval head on the card or bag. The child glues the hands at the top as antlers, draws the eyes with the marker, and glues on a red paper circle for the nose. The circle should be bigger than a coin, comfortably. Time: twenty minutes. Mess: low. Adult: tracing, cutting. Child: gluing, eyes, nose, deciding the antlers point sideways.
9. Torn-paper stocking. Materials: card, a sheet or two of tissue or coloured paper, glue stick. Steps: the adult draws a large stocking outline on the card. The child tears the tissue into pieces of any size and glues them inside the outline until it is covered, overlapping as much as they like. A strip of white paper glued across the top makes the cuff. Time: twenty minutes. Mess: paper confetti on the floor. Adult: outline, cuff. Child: tearing, gluing, coverage.
The Better Kid Care advice that applies to all four: children need "large pieces of paper (to have full range of motion) as well as a variety of brush sizes to experiment with." A card that is too small turns dotting into a precision task the child did not sign up for.
Around Five: Scissors, Order and Patience
These projects ask for scissors along a curve or several straight cuts in a row, a set of steps that have to happen in order, and a pause while glue holds before the next piece is added. The adult moves from doing to watching.
10. Cut-and-stack snowman. Materials: white paper, blue or dark card, pencil, child scissors, glue stick, marker, a strip of coloured paper. Steps: the adult draws three circles of different sizes on the white paper, using a cup, a mug and a bowl as templates. The child cuts them out, following the curve, and glues them on the card from largest at the bottom to smallest at the top. Then the face, buttons and a scarf strip. Time: twenty-five minutes. Mess: low. Adult: circles. Child: cutting, ordering, gluing, face.
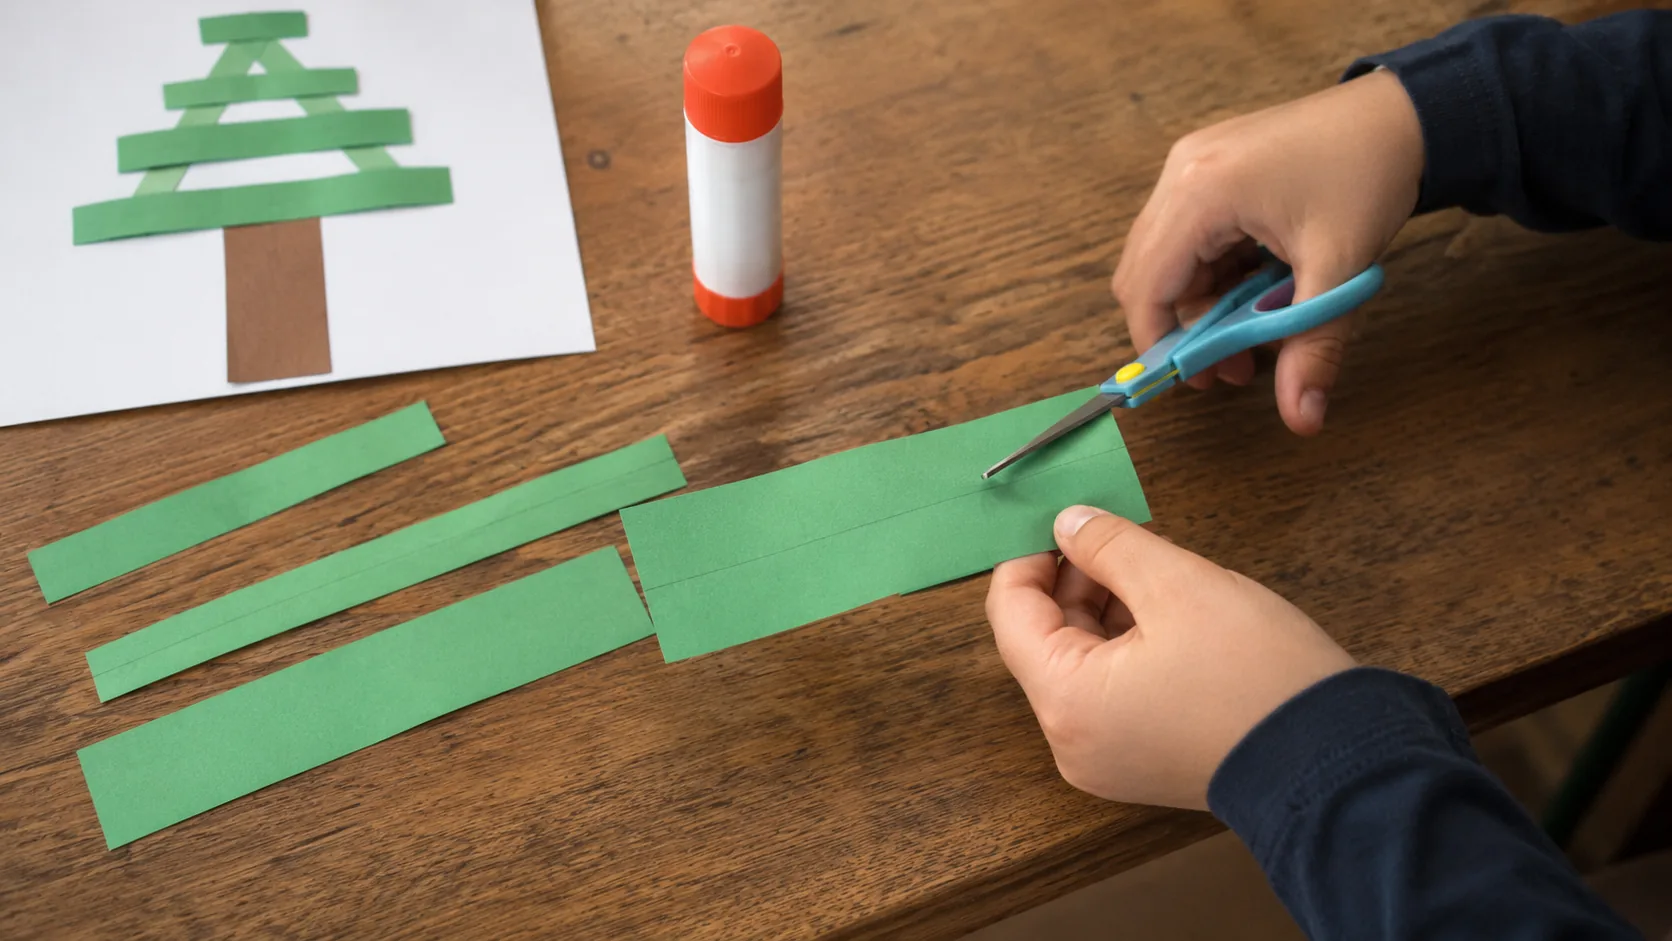
11. Strip tree. Materials: green paper in one or two shades, card, child scissors, ruler or straight edge, glue stick. Steps: the adult rules lines across the green paper so the child cuts straight strips. The child cuts, then trims the strips to different lengths and glues them onto the card starting with the longest at the bottom, each one shorter than the one below, until a triangle forms. A small brown rectangle at the bottom is the trunk. Time: thirty minutes. Mess: paper offcuts. Adult: ruling the lines. Child: cutting, sizing, order.
12. Paper-cup bell. Materials: a paper cup, washable paint, a brush, a scrap of paper, tape, a marker. Steps: the child paints the outside of the cup and lets it dry. Upside down, the cup is a bell that sits on the table. The child draws a band around the rim and tapes a short strip of paper on top as a loop, purely decorative. Time: fifteen minutes plus drying. Mess: paint on fingers. Adult: nothing much. Child: all of it. A table bell, not one meant to hang.
13. Tape-resist star on a card. Materials: card folded in half, masking tape, paint, a sponge. Steps: the child, with help if the tape fights back, tears five short strips of masking tape and lays them on the front of the folded card in a rough star. The child sponges paint across the whole front, over the tape. When dry, peel the tape: a card-coloured star in a painted sky. Written inside, it is a Christmas card the child made every part of. Time: fifteen minutes plus drying. Mess: medium. Adult: help laying tape, peeling if it tears. Child: layout, colour, the message.
Who Holds the Scissors
This is the question that decides which group a project belongs to, so here is the split in practice.
The adult cuts. All of group three, plus the antlers and the ring in group four. Whenever the shape has to be a particular shape for the project to work, the adult cuts it before the child sits down. Better Kid Care lists "patterns to follow or lines to cut on" among the things that limit a child's creative ideas; a cut shape with full freedom inside it is the compromise these projects make.
The child tears. Tissue for the stocking, a rough outline for the reindeer hands, strips of tape for the star. No tool, and an edge nobody has to judge.
The child cuts, straight. The strips for the tree: a ruled line, rounded-tip scissors, the adult holding the far end of the sheet.
The child cuts, on a curve. The snowman circles. If the curve is still hard, cut a rough square around each circle and glue the square; the snowman survives.
At every level the scissors are rounded, child-sized, and go back in a pot blades down when the cutting is over.
Mess, Drying and What to Keep
Set the boundary first. A tray for salt, a plate for paint, newspaper or a wipeable cloth under everything, an old shirt over the top. Better Kid Care recommends teaching children "where materials are kept, how to clip paper to an easel or tape to a table, where to place it for drying, and proper clean-up steps." The drying place matters here: half of these projects leave the table wet and need somewhere flat where nobody will lean on them.
Small amounts, refilled. A spoonful of paint on a plate, topped up when it runs out, instead of a pot the child can tip.
Expect the project to change. The wreath may become a face, the strip tree a road. Better Kid Care's line is that "children don't need to make a finished product to learn from art." If the finished thing is not a tree, it is still finished.
Keep the photo, not necessarily the object. Salt flakes off, paper cups crush, handprints fade. A photograph in daylight, flat on the table with the child's hands in the frame, keeps more than the object does. Our guide to photography for beginners starts with exactly that kind of shot. One folder, or one link, for the whole month saves searching next December.
Keep What They Made This Christmas
One link for the handprints, the strip tree and the photos of the hands that made them.
FAQ
What are easy Christmas crafts for a three-year-old?
Projects that use the whole hand and no scissors: the handprint tree, the sponge-dab tree inside a masking-tape boundary, the salt-sparkle star, pine-sprig printing and the paper-plate snowman. In each one the adult prepares the sheet and the child does all the painting and pressing.
Can preschoolers use glitter?
Better Kid Care lists glitter among items that pose a safety risk and should not be accessible to children under three, alongside button batteries, magnets, plastic bags, styrofoam, coins, balloons and latex gloves. For sparkle, the same source suggests adding salt or sugar to paint.
What size do craft pieces need to be to be safe?
For children under three and any child who still puts things in their mouth, Better Kid Care advises items at least 1¼ inch in diameter and between 1 and 2¼ inches long, with oval items at least 1¾ inch in diameter. That is why none of these projects uses pompoms, beads, sequins or googly eyes.
What Christmas crafts can preschoolers make without a kit?
All thirteen here use paper, card, washable paint, a glue stick, masking tape, paper plates and cups, cotton swabs, salt and a sprig from outside. Nothing is bought as a set.
How do I keep a Christmas craft from being a mess?
Set the boundary before the child sits down: a tray under salt projects, paint on a plate in small amounts, a flat drying spot decided in advance. Better Kid Care suggests smaller quantities of paint so children can manage fewer spills.
At what age can a child use scissors for these crafts?
The list does not set an age. The first group needs no cutting by the child, the second asks for tearing or one straight cut with help, and the third asks for strips and curves. Move between groups based on the child at the table, not the birthday.
What if my child does not make a tree at all?
Then the sheet is green and the child is happy. Better Kid Care is clear that what children are doing matters more than what they make, and lists finishing a child's work, or telling them to finish it, among things to avoid.