

A preschool Thanksgiving craft has one job: end up looking a little like a turkey, a leaf or a pumpkin while being made almost entirely by a three-year-old's hands. That rules out anything that needs neat cutting, tiny parts or an adult finishing the edges.
The ten projects below use paper, paint, glue, leaves from a walk and a few things from the kitchen. Each one says what the child does, what the adult does, how long to expect, and how much mess to plan for. The safety limits for this age come first, because at three they are not general advice.
One Link for This Year's Turkeys
A short address you control, holding the photos of the handprints and cards you want to keep and share with family.
What Three to Five Year Old Hands Can Do
Every project here is built from four actions: tearing paper, spreading glue, pressing a painted hand or object onto paper, and painting with fingers or a thick brush. Those are things a preschooler does on their own. Cutting a curved line or placing a tiny piece exactly where it belongs are not.
There is a real tension in themed crafts for this age. Penn State Extension's Better Kid Care programme notes that "crafts tend to limit a child's creative ideas," and lists among the things to avoid "creating a craft project for the children to see and make the same thing" and "finishing a child's work or telling a child to finish it to make it better." The same source says that for young children "what they are doing is most important, not what they make."
The way these projects handle that: the adult prepares a base (a paper plate, a card folded in half, a trunk shape), the child does everything that goes on it, and the adult never fixes it afterwards. A turkey with feathers on its head and a pumpkin that is half green are the correct outcome.
In the United States the holiday falls on the fourth Thursday of November, a date fixed by Congress in 1941 according to the National Archives. The motifs below (turkey, leaves, corn, apples, pumpkins, giving thanks) are the generic ones, with no characters and no kits.
Materials and Safety at This Age
Small parts. Better Kid Care gives concrete limits: "Young children can choke on small objects and toy parts. All items used for children under three years of age and any children who put toys in their mouths should be at least 1¼ inch in diameter and between 1 inch and 2¼ inches in length." Note the second condition. It covers any child who still puts things in their mouth, whatever their age. In practice that means no googly eyes, beads, sequins, buttons or dried beans on the table for the projects below.
Glitter. The same source lists items that "should not be accessible to children under three," including "button batteries, magnets, plastic bags, styrofoam objects, coins, balloons, latex gloves, and glitter." Loose glitter near a small face is the practical problem, so these projects use none.
Paint and glue. Better Kid Care advises considering "any safety factors, such as non-toxic materials." In the United States, art materials sold to consumers must carry a statement of conformance to ASTM D-4236, the labelling practice for chronic hazards, according to the Consumer Product Safety Commission. Look for that line on paint, glue and markers, and choose products with no cautionary warning on the label. Washable finger paint, school glue and glue sticks are what every project here assumes.
Scissors. Nothing below asks the child to cut. Where a shape has to be cut, the adult does it before the child sits down. Tearing replaces cutting everywhere else.
Natural materials. Leaves, a halved apple and a corn cob are handled by the child. Acorns, seeds and small pine cones are not, for the size reason above.
Turkey Projects
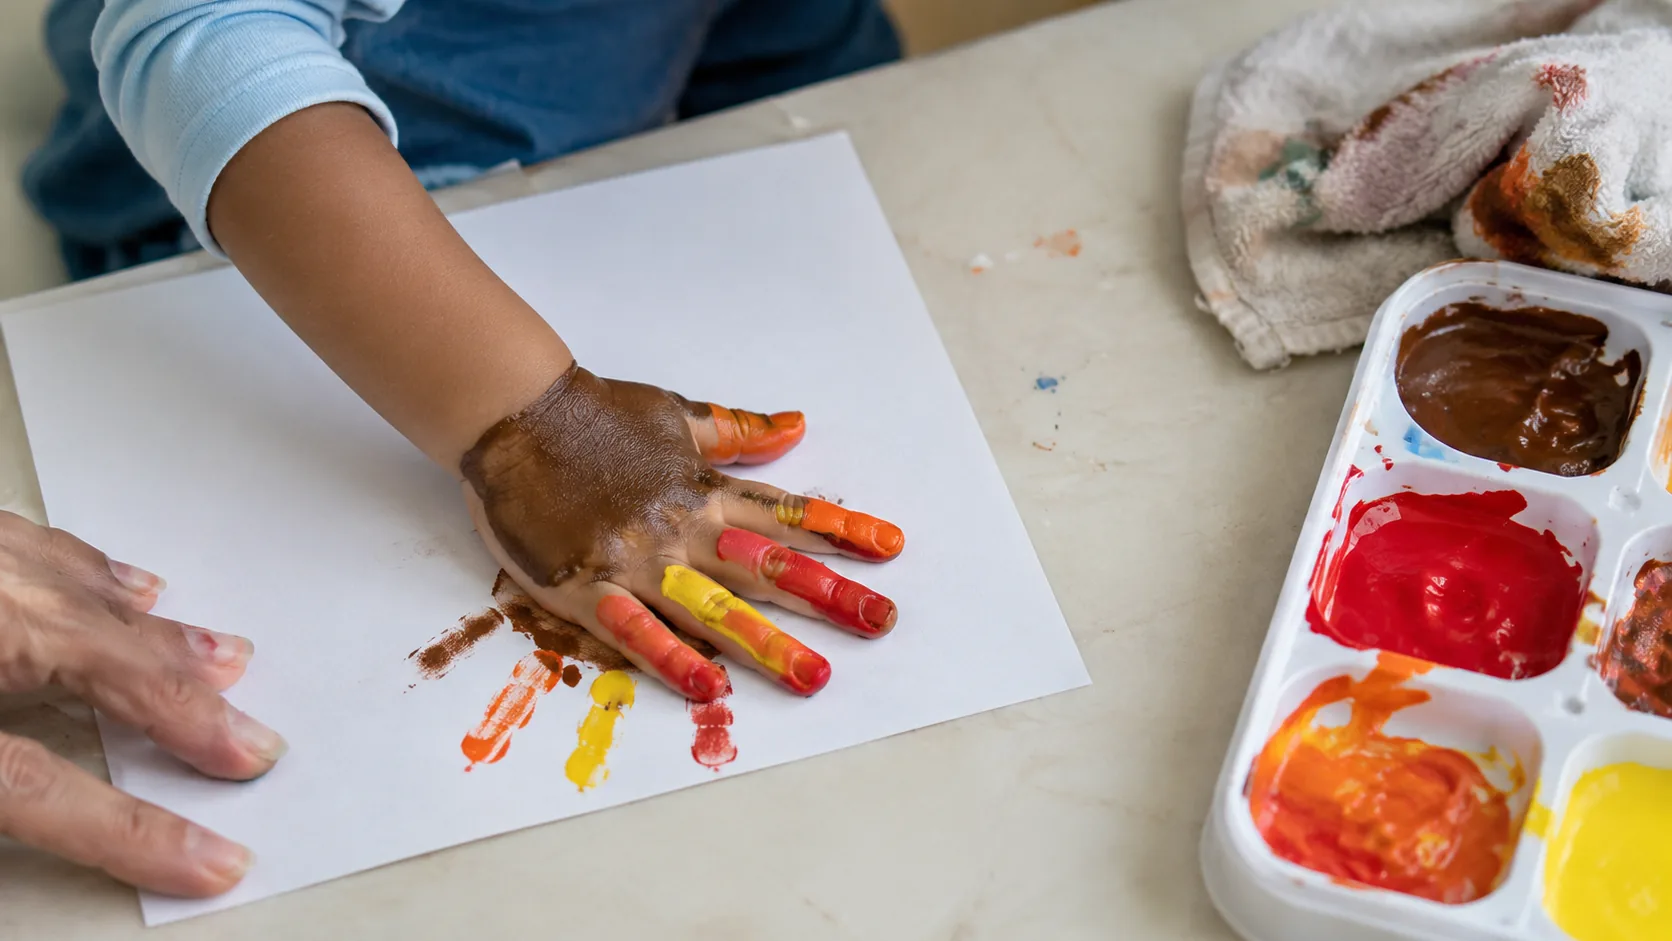
1. Handprint turkey. The child's own hand is the whole design.
Materials: thick paper or card, washable finger paint in brown plus three or four autumn colours, a shallow tray or paper plate for each colour, a wet cloth.
Time: about fifteen minutes, as an estimate, plus drying.
Steps: the adult paints the child's palm and thumb brown and each finger a different colour, using a brush or by dipping. The child presses the hand flat onto the paper and lifts straight up. Once dry, the child adds an eye with a fingertip of paint and legs with a finger dragged downward. Wattle and beak are torn scraps of red and orange paper, glued on by the child.
Mess: high on hands, low on the table if the tray is used. Keep the cloth within reach before the first dip.
Adult: paints the hand, holds the paper still. Child: presses, adds eye, legs, beak, wattle.
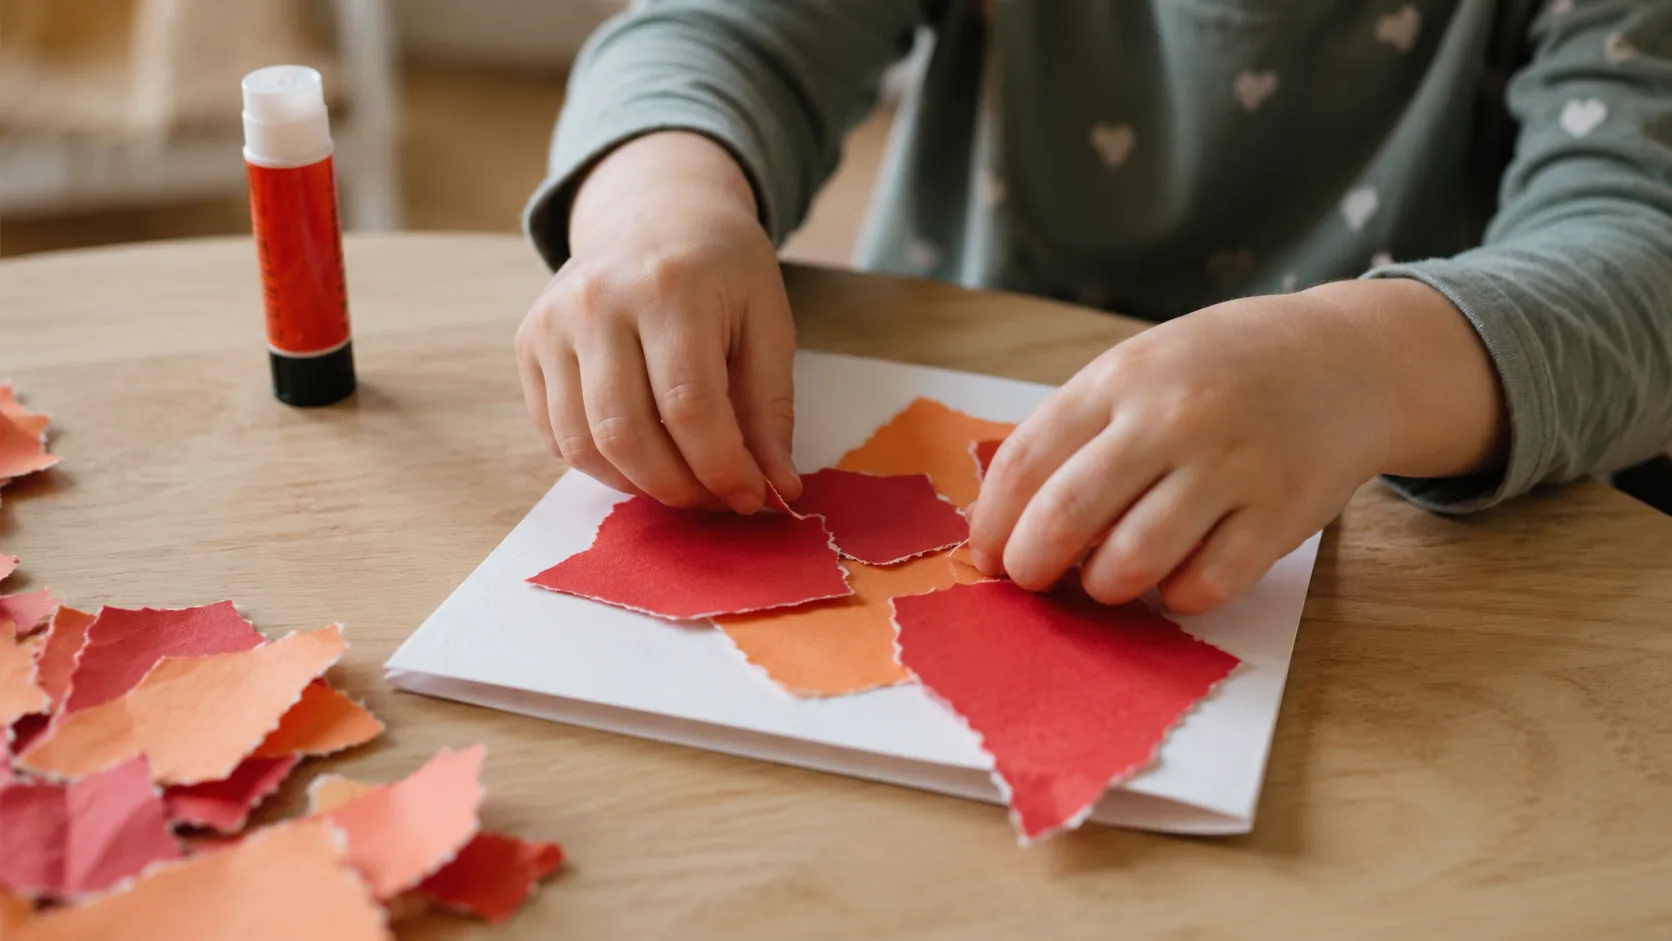
2. Torn-paper turkey on a paper plate.
Materials: one paper plate, coloured paper (any scrap will do), glue stick or a small pot of school glue with a brush, one brown circle cut by the adult for the body.
Time: about twenty minutes, as an estimate.
Steps: the child tears the coloured paper into strips and pieces of whatever size comes out. The child spreads glue over the top half of the plate and lays the torn pieces around the rim as feathers, overlapping as they like. The adult hands over the brown body circle; the child glues it in the centre and adds two torn paper eyes and a torn beak.
Mess: low. Torn paper scraps on the floor, some glue on fingers.
Adult: cuts the body circle, opens the glue. Child: tears, glues, arranges.
Leaves and Autumn Trees
3. Leaf rubbing.
Materials: fresh fallen leaves with clear veins, thin paper, crayons with the paper peeled off.
Time: about ten minutes, as an estimate, plus the walk to collect leaves.
Steps: the child places a leaf underside up on the table, the adult lays the paper over it and holds the corners. The child rubs the side of the crayon over the paper until the leaf appears. Move the leaf, change colour, repeat until the page is full of overlapping leaves.
Mess: none.
Adult: holds the paper still. Child: chooses leaves, rubs.
4. Leaf printing.
Materials: the same leaves, washable paint in two or three colours, a brush, large paper.
Time: about fifteen minutes, as an estimate.
Steps: the child paints the underside of a leaf with a brush, turns it over onto the paper, and the adult presses a flat hand over it. Peel the leaf off by the stem. Repeat with new leaves and colours. Paint two colours on one leaf for a print that changes across it.
Mess: moderate. Leaves get painted on both sides fairly quickly.
Adult: presses the leaf flat, peels it. Child: paints the leaf, places it.
Keep the Ones Worth Keeping
Photograph the leaf prints and the arm tree before they get crushed in a bag, and keep them behind one address the grandparents can open.
5. Arm-print autumn tree.
Materials: a large sheet of paper, brown washable paint, torn scraps of red, orange and yellow paper, glue stick.
Time: about twenty minutes, as an estimate, plus drying.
Steps: the adult paints the child's forearm and open hand brown. The child presses the forearm onto the paper with fingers spread: the arm is the trunk, the fingers are the branches. Wash the arm. Once dry, the child glues torn leaf scraps onto the branches and lets a few fall to the ground at the bottom.
Mess: high for a minute, on one arm.
Adult: paints the arm, guides it down onto the paper. Child: presses, tears, glues.
Corn, Apples and Pumpkins
6. Fingerprint corn cob.
Materials: card with a long oval torn from yellow or cream paper and glued down by the child, washable paint in yellow, orange and brown on a plate, green paper for husks.
Time: about ten minutes, as an estimate.
Steps: the child covers the oval in fingerprints, mixing the three colours however they like. When it is dry, the child tears two long strips of green paper and glues one to each side of the cob as husks.
Mess: moderate on fingers.
Adult: sets out paint and paper. Child: prints, tears, glues.
7. Apple half stamping.
Materials: one apple cut in half by the adult, washable paint in red, green and yellow on plates, large paper. Cut one half across the middle so the star of the core shows in the print, and remove the seeds first.
Time: about fifteen minutes, as an estimate.
Steps: the child presses the flat face of the apple into paint and stamps it onto the paper, again and again. A fork pushed into the back of the apple half by the adult gives a handle that a small hand can hold. Rows of stamps make a table runner; one stamp on a folded card makes a card.
Mess: moderate. Paint on the table around the plates.
Adult: cuts the apple, removes seeds, adds the fork. Child: stamps.
8. Sponge pumpkin.
Materials: a large pumpkin shape cut by the adult from card, or simply a whole sheet of paper, orange and a little red and yellow washable paint, a clean kitchen sponge cut into a few blocks, a torn strip of green paper for the stem.
Time: about fifteen minutes, as an estimate, plus drying.
Steps: the child dabs the sponge into paint and presses it over the shape until it is covered. Different sponge blocks for different colours, or one sponge for everything and a muddier pumpkin. The child glues the green stem at the top when the paint is dry.
Mess: moderate. Sponges drip.
Adult: cuts the shape and the sponge. Child: dabs, glues.
One Address for the Whole Season
The apple prints, the pumpkin and the card all in one link you can share with the people they were made for.
Gratitude Cards and Table Pieces
9. Thankful handprint card.
Materials: a card folded by the adult, washable paint in one colour, a pen for the adult.
Time: about ten minutes, as an estimate, plus drying.
Steps: the child presses a painted hand onto the front of the card. While it dries, the adult asks what the child is thankful for and writes the answer inside, word for word, including the answers that make no sense to an adult. The child decorates the inside with fingerprints or torn paper if they want to.
Mess: low.
Adult: folds the card, writes the words exactly as said. Child: handprint, decoration, the words themselves.
10. Gratitude leaf garland.
Materials: large leaf shapes torn or cut by the adult from autumn coloured paper, a length of string or wool, a glue stick, a pen for the adult.
Time: about twenty minutes, as an estimate, over more than one sitting if you like.
Steps: the child paints or fingerprints each leaf, or leaves it plain. The adult writes one thing the child said they are thankful for on each leaf. The adult lays the string on the table; the child spreads glue along the top of each leaf and presses it onto the string, then the adult folds the leaf top over the string so it holds. Hang it where the family eats.
Mess: low.
Adult: prepares leaves, writes, folds them over the string. Child: decorates, glues, chooses the order.
Setup, Mess and Timing
Small quantities of paint. Better Kid Care recommends "offering smaller quantities of paint so children can manage fewer spills and can mix colors without ruining large containers of paint." A spoonful on a paper plate per colour is plenty for any project here.
Large paper, thick brushes. The same source notes that "young children need large pieces of paper (to have full range of motion) as well as a variety of brush sizes."
Set the boundary first. A tray, a wipe-clean tablecloth or a low table that can take paint. Have the wet cloth on the table before the first handprint, not in the next room.
One project per sitting. The time estimates above are for a child who is interested. Better Kid Care frames the activity as something to encourage "where it interests the child, not the adult." If they are done after one handprint, they are done, and the second half of the turkey can happen tomorrow.
Keeping it. Handprints and leaf prints on thin paper crease in a bag. Photograph them flat, in daylight, before they leave the table. A few basics on photographing things properly go a long way for a piece of card on a kitchen table.
FAQ
What Thanksgiving crafts can a three-year-old actually do?
Ones built from tearing, gluing, pressing and finger painting: a handprint turkey, a torn-paper turkey, leaf rubbings, apple stamping and a handprint card.
Are googly eyes safe for preschool crafts?
Better Kid Care advises that items for children under three, and for any child who still puts things in their mouth, should be at least 1¼ inch in diameter. Googly eyes, beads and sequins are smaller than that, so the projects here use torn paper or a fingerprint for eyes instead.
Can preschoolers use glitter?
Better Kid Care lists glitter among items that should not be accessible to children under three. None of the projects here use it.
What paint should I use for handprints?
Washable finger paint or washable tempera. In the United States, consumer art materials carry a statement of conformance to ASTM D-4236 according to the Consumer Product Safety Commission; choose products with that line and no cautionary warning.
How do I make a handprint turkey with a toddler?
The adult paints the palm and thumb brown and the fingers in different colours, the child presses the hand flat on paper and lifts straight up. Eye, legs, beak and wattle are added by the child with a fingertip and torn paper after it dries.
What do I do with the finished crafts?
Hang the garland where you eat, give the cards to the people they are for, and photograph the rest flat before it gets creased.
References
- Penn State Extension, Better Kid Care: Arts and creativity in three- and four-year-olds. Choking size limits, the list of items to keep from children under three including glitter, and what preschoolers do with materials.
- Penn State Extension, Better Kid Care: Children's art. Why crafts limit ideas, what to avoid, and what to say about a child's work.
- Penn State Extension, Better Kid Care: Painting with young children. Non-toxic materials, small quantities of paint, large paper and brush sizes.
- U.S. Consumer Product Safety Commission: Art Materials (LHAMA). The ASTM D-4236 conformance statement required on art materials sold to consumers.
- U.S. National Archives: Congress Establishes Thanksgiving. The fourth Thursday of November fixed as the federal holiday in 1941.
Keep What They Made
One link for the handprints, the cards and the words they said this year.